Updated on October 29, 2021
2019 and a New Fuel Tank
Our last entry was May 31, 2018. We have come ashore to recover both physically and, more importantly, fiscally. I have been back at work at my old company, mostly working proposals.
The summer of 2018 was spent away from Sophia for the most part. A big proposal I was working on took up most weekends through September, and there was one after that that ate up a lot of time. Jamie (my oldest daughter) and first granddaughter Zoe spent some time onboard with Zoe taking sailing lessons. At the end of that week, our ancient air conditioner finally gave up and stopped cooling. Anther expensive repair.
Sophia’s engine needed a major maintenance check, and we scheduled one for September. It turned out to be a bit more than routine. The routine stuff included adjusting the injectors, replacing the water pump, replacing the thermostat and the fuel filter, and changing the coolant. But once they got in there, some “interesting” items were discovered.
- We have been throwing (breaking) drive belts pretty routinely since I bought the boat, often at the most inopportune moments, like coming into port right before a storm hit. The mechanics took a look at the alternator and determined it had a bent shaft. It was easier and about the same price to have the alternator rebuilt. So, we did.
- We had experienced a leak at the seal where the shaft goes outside the boat to the propeller. We had it worked on at our last stop on the way home, but it was leaking again. Turned out the setscrews on the rotor that sits on the shaft were worn, and the rotor was slipping on the shaft allowing water into the boat. To get to that rotor required that the shaft be uncoupled from the engine, and of course the coupling was frozen (common occurrence). To complete the repair, the coupling had to be cut, the rotor then replaced, and a new coupling installed. So, we did. But we don’t have water coming into the boat anymore, which is really good news.
- Phil, our young mechanic, noticed that there were some rust stains coming from the exhaust manifold. Further inspection revealed a leak in the heat exchanger which required replacement along with a new exhaust manifold. So, we did.
- Finally, Phil recommended replacing the engine mounts which have a tendency to get broken as they get older. So, we did.
- When Phil tested the engine, all went well except the alternator was not charging. A call to the electricians to investigate revealed the alternator regulator was bad and required replacement. So, we did.
Wow, now we were good to go. It was late October. Time for one quick sail before winter, but I got busy at work and never made it. We prepared the boat for winter.
There was one last detail, a simple oil change that we finally got around to in February. After the oil change, the mechanics mentioned that the fuel filter looked pretty bad. They suggested I have the fuel “polished” and the fuel tank cleaned. So, we did.
On March 15th (“Beware the ides of March”), the fuel and tank guy (“Dr. Fuel”) comes down to the boat and does his thing. The inside of the tank was reportedly really bad with about an inch of gunk (collecting for at least 10 years and maybe as long as 30 years) sitting in the bottom of the tank. That was a Friday. I visited the boat on Sunday and all was fine.
Meanwhile, Elena left for her spring visit to Russia.
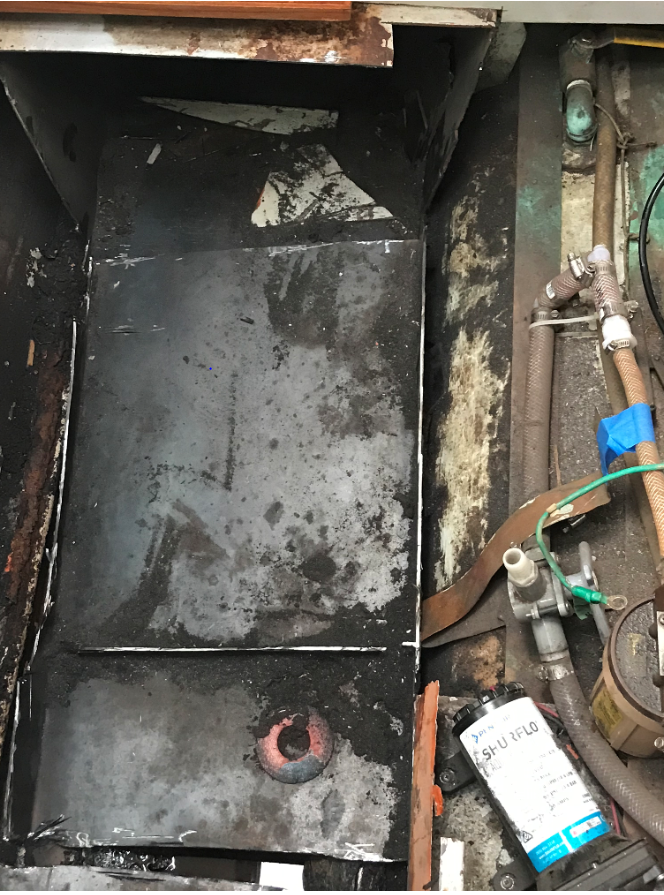
I went down to the boat the next weekend, and to my everlasting shock there was 3 inches of fuel in the bilges Our fuel tank had developed a hole. How big and where was unknowable. It was not fixable and the tank would have to be replaced. And so we did.
Meanwhile we were moving to a different marina and I no longer had an engine. I ended up having to pay for towing services to move the boat to E-Dock, Herrington Harbour North, our old home.
The Fuel Tank Marathon Begins
A journey of ten thousand miles starts with a single step. And so it began, us working only weekends.
First, I had to get the fuel out of the tank. There was residual fuel in the tank that needed to be removed, maybe 10 gallons so I thought. I started to extract it a gallon at a time with my hand pump and dumping in the used oil tank, but after 8 or so trip, I had hardly made a dent in the amount of fuel in the tank, Another call to Dr. Fuel, another few hundred dollars, and we got most of the fuel out of the tank.
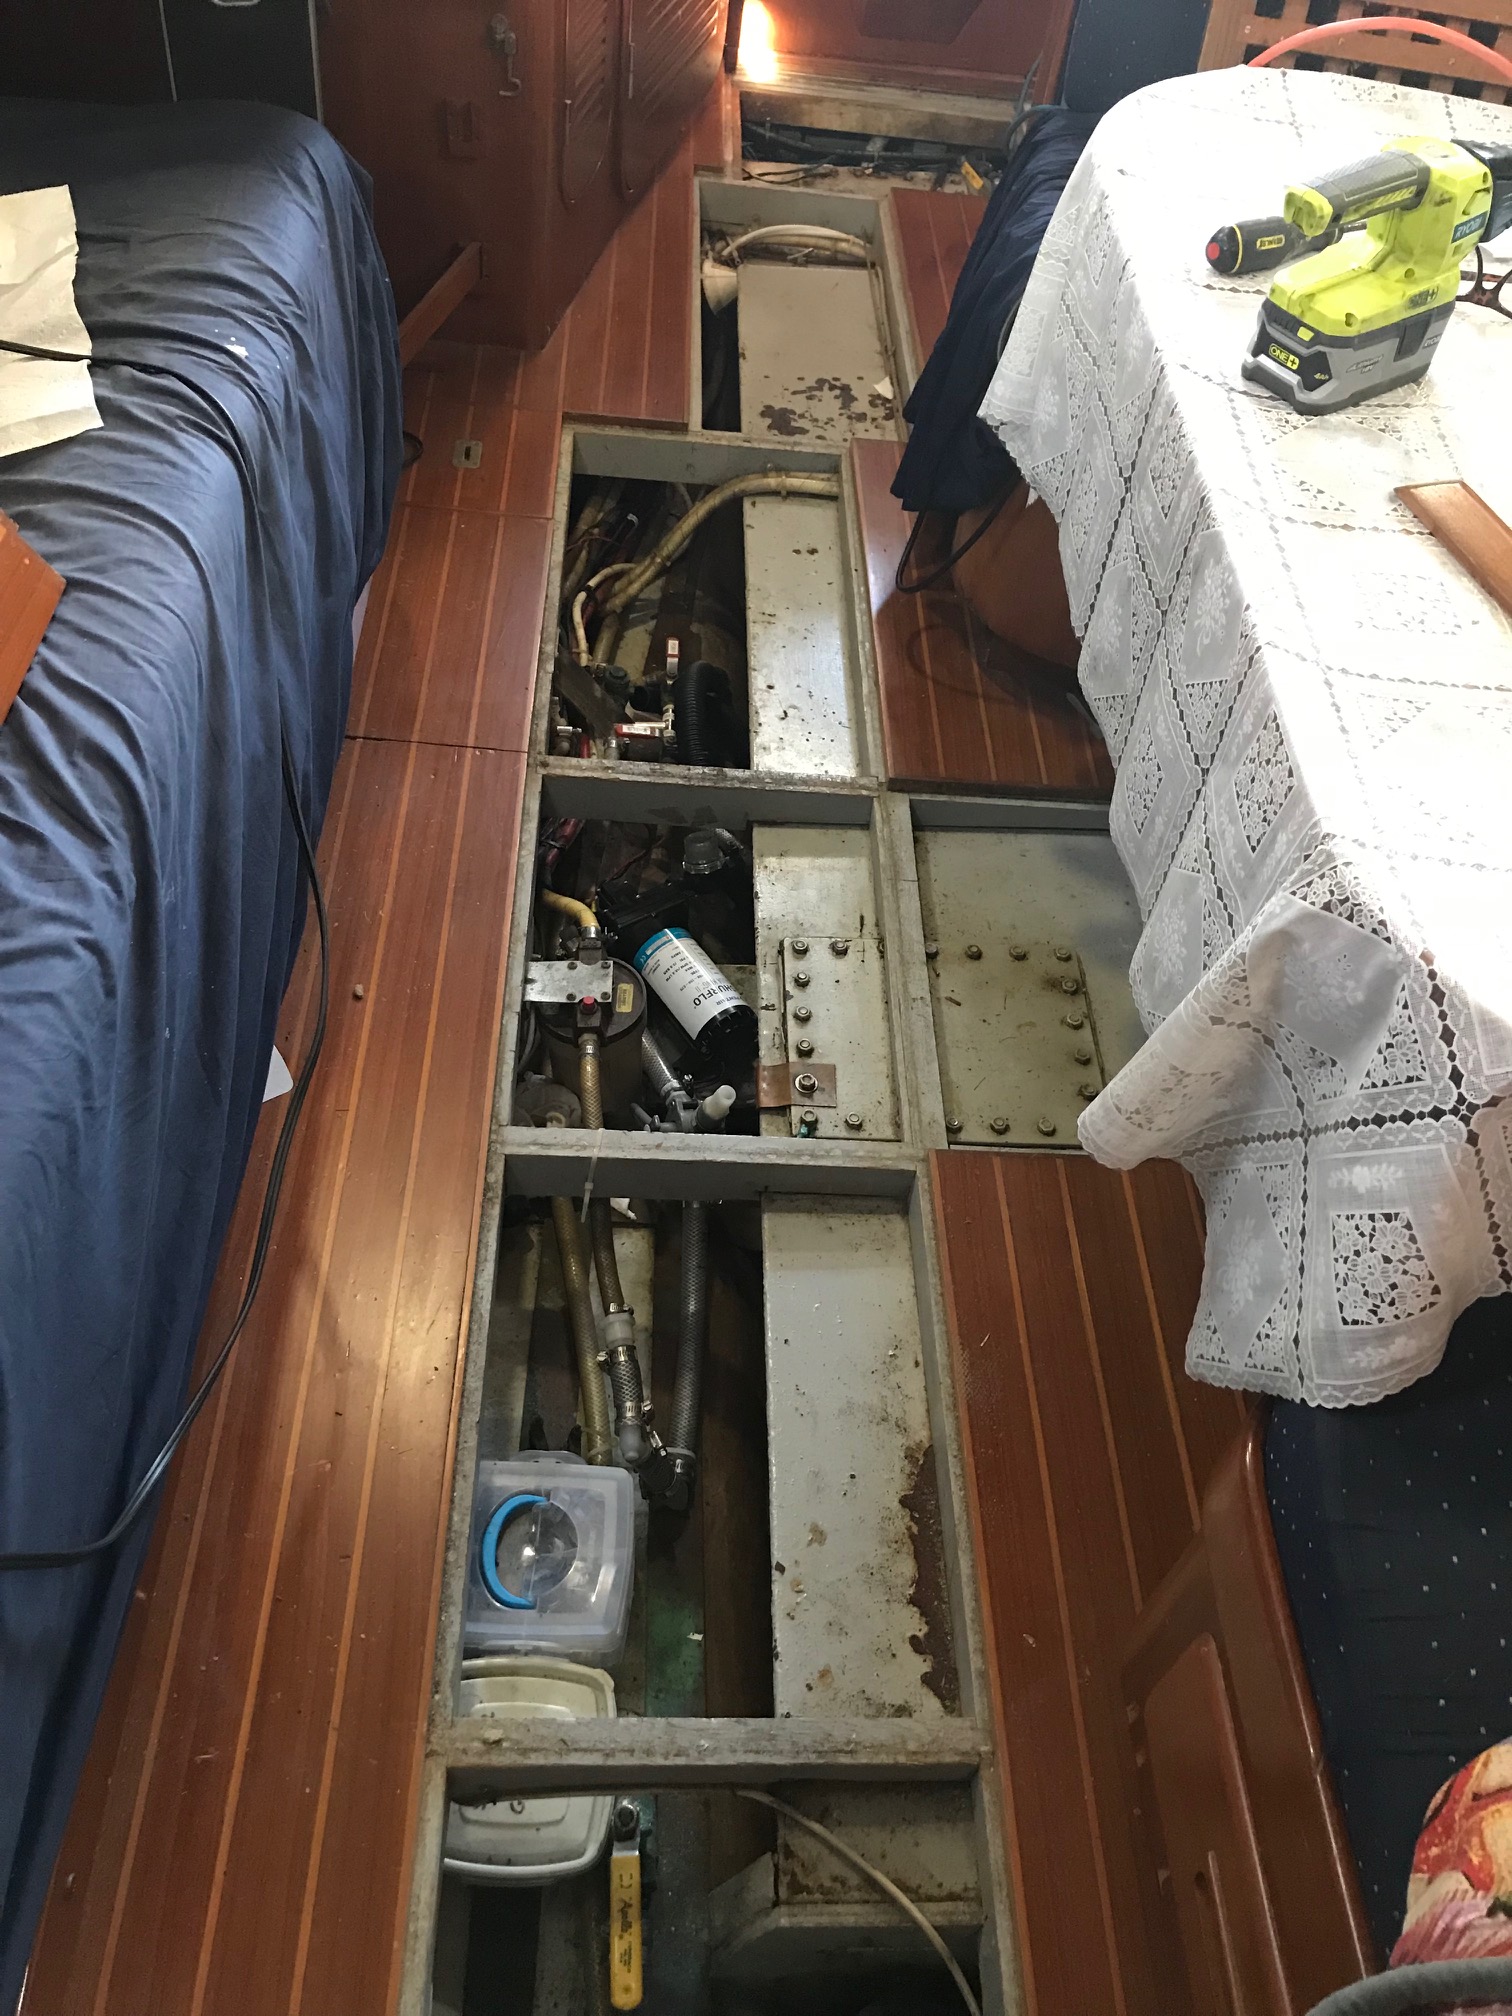
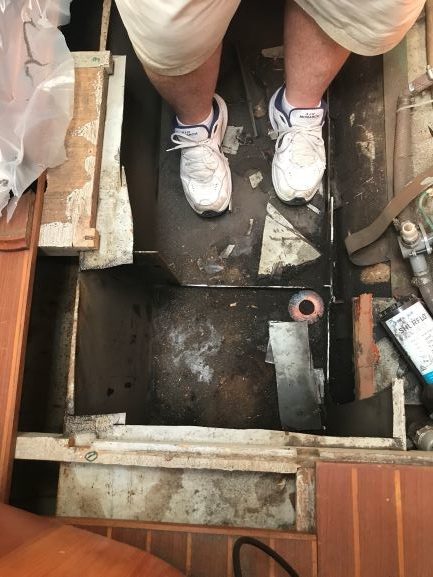
The fuel tank was 109 inches long. It was put in place and then the boat built around it. To get the tank out, it had to be cut into pieces, and a good deal of the interior floor (“cabin sole” in nautical terms) would have to be cut away. I wanted to be careful about doing the cutting so as not to ruin the interior, so I asked the professionals to do the cutting of the cabin sole.
Unfortunately, it was now Spring (everyone wants work done on their boats in the Spring) and the carpenter shop was too busy to get to me. It would take another six weeks to get someone over.
I finished getting the fuel out of the tank and then soaking it up with absorbent cloth. I was going to be cutting the metal out with a grinder, producing a lot of heat, and I did not want a fire.
The early going was slow, having limited access and experimenting with various tools. At one point I was cutting one square inch at a time.
Watch as I use a recipicating saw to remove an accessible area
Finally, the carpenters got to Sophia for cutting out the deck. As expected, they did a really professional job, and I had access to the forward end of the tank. And perhaps even more encouraging, Elena returned home.
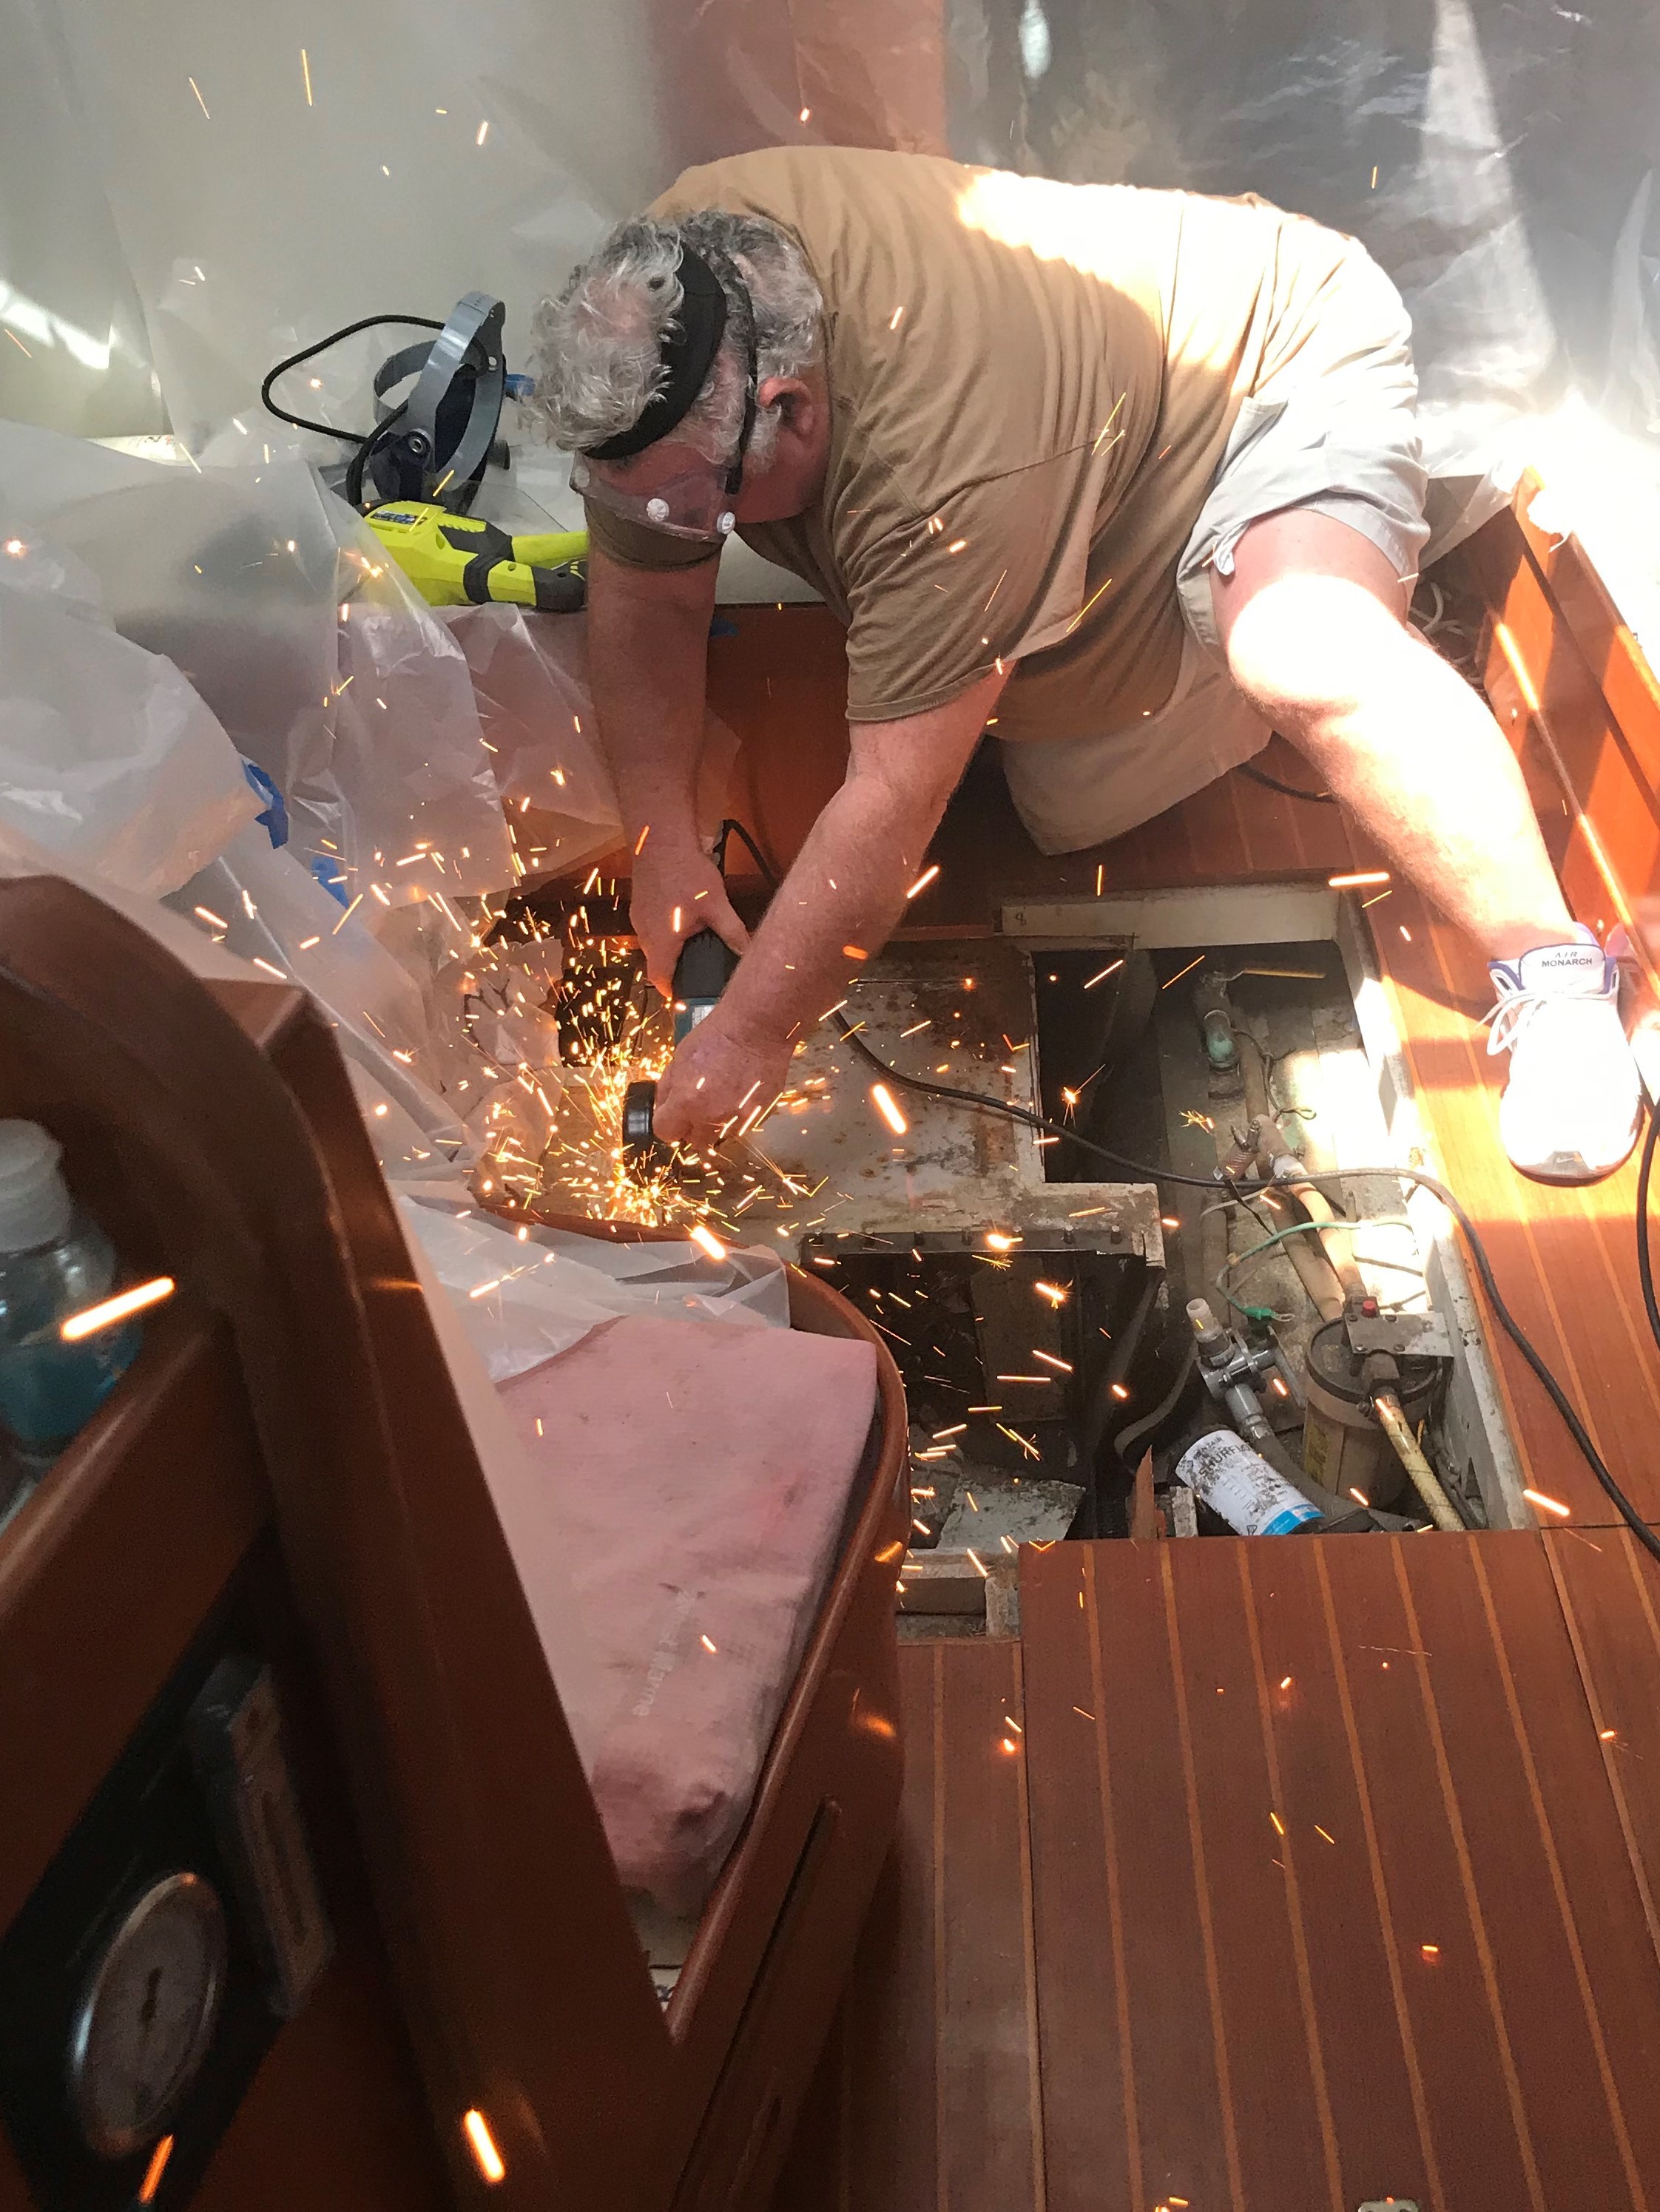
By now it was getting hot (remember the air conditioner was broken) and the work was very physical, with most of it done bent over trying to get to the bottom of the boat. We were driving back and forth, limited to about 6 hours of work, working mostly on the weekends.
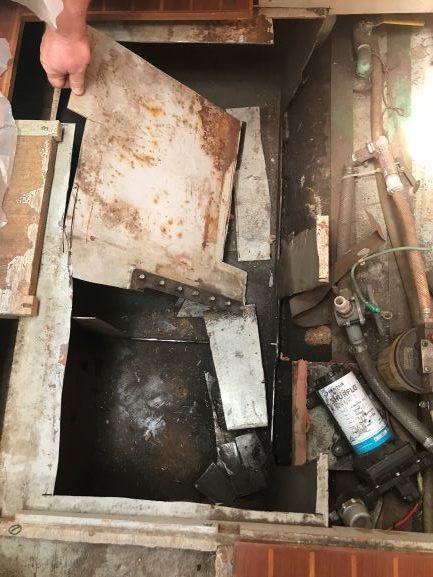
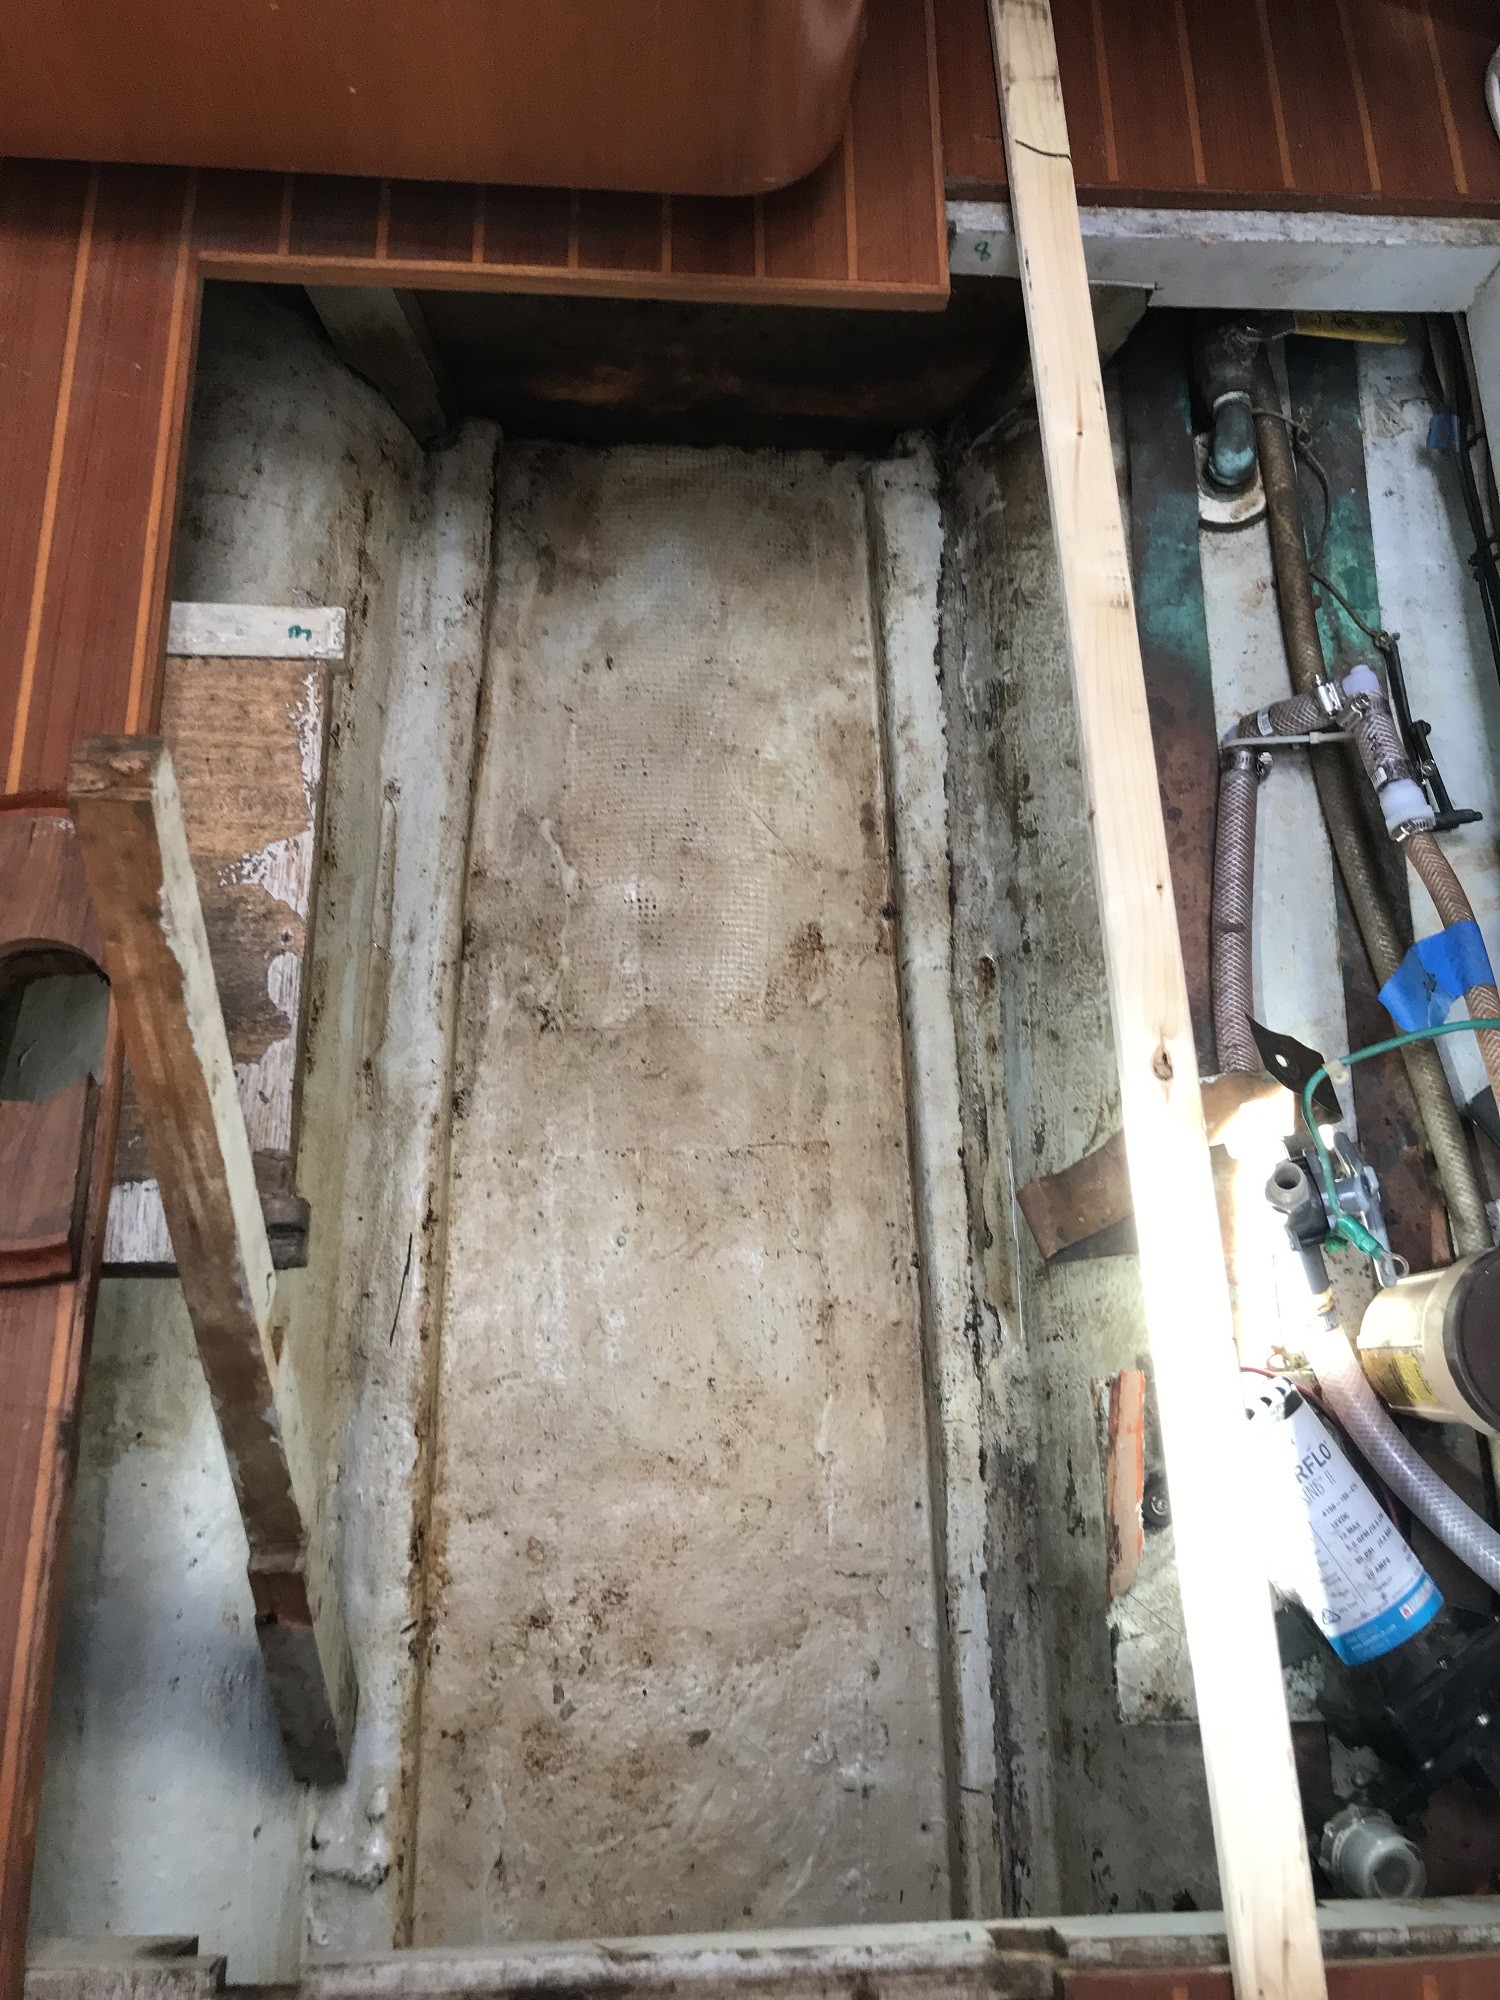
At the end of May, after two months of work, we had finally got the front end of the tank out. Elena then removed thirty years of gunk that was under the tank (bless her heart), giving me a place to work. Using a 6 foot two by four and a ratchet, we inched the remainder of the tank forward, cutting a few inches at a time
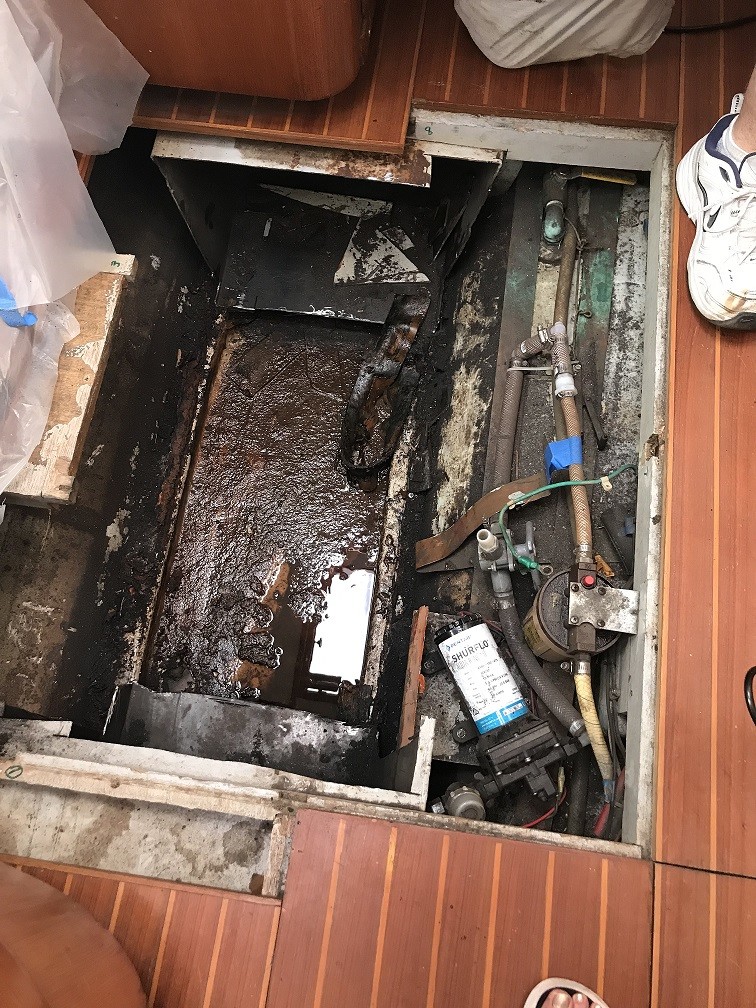
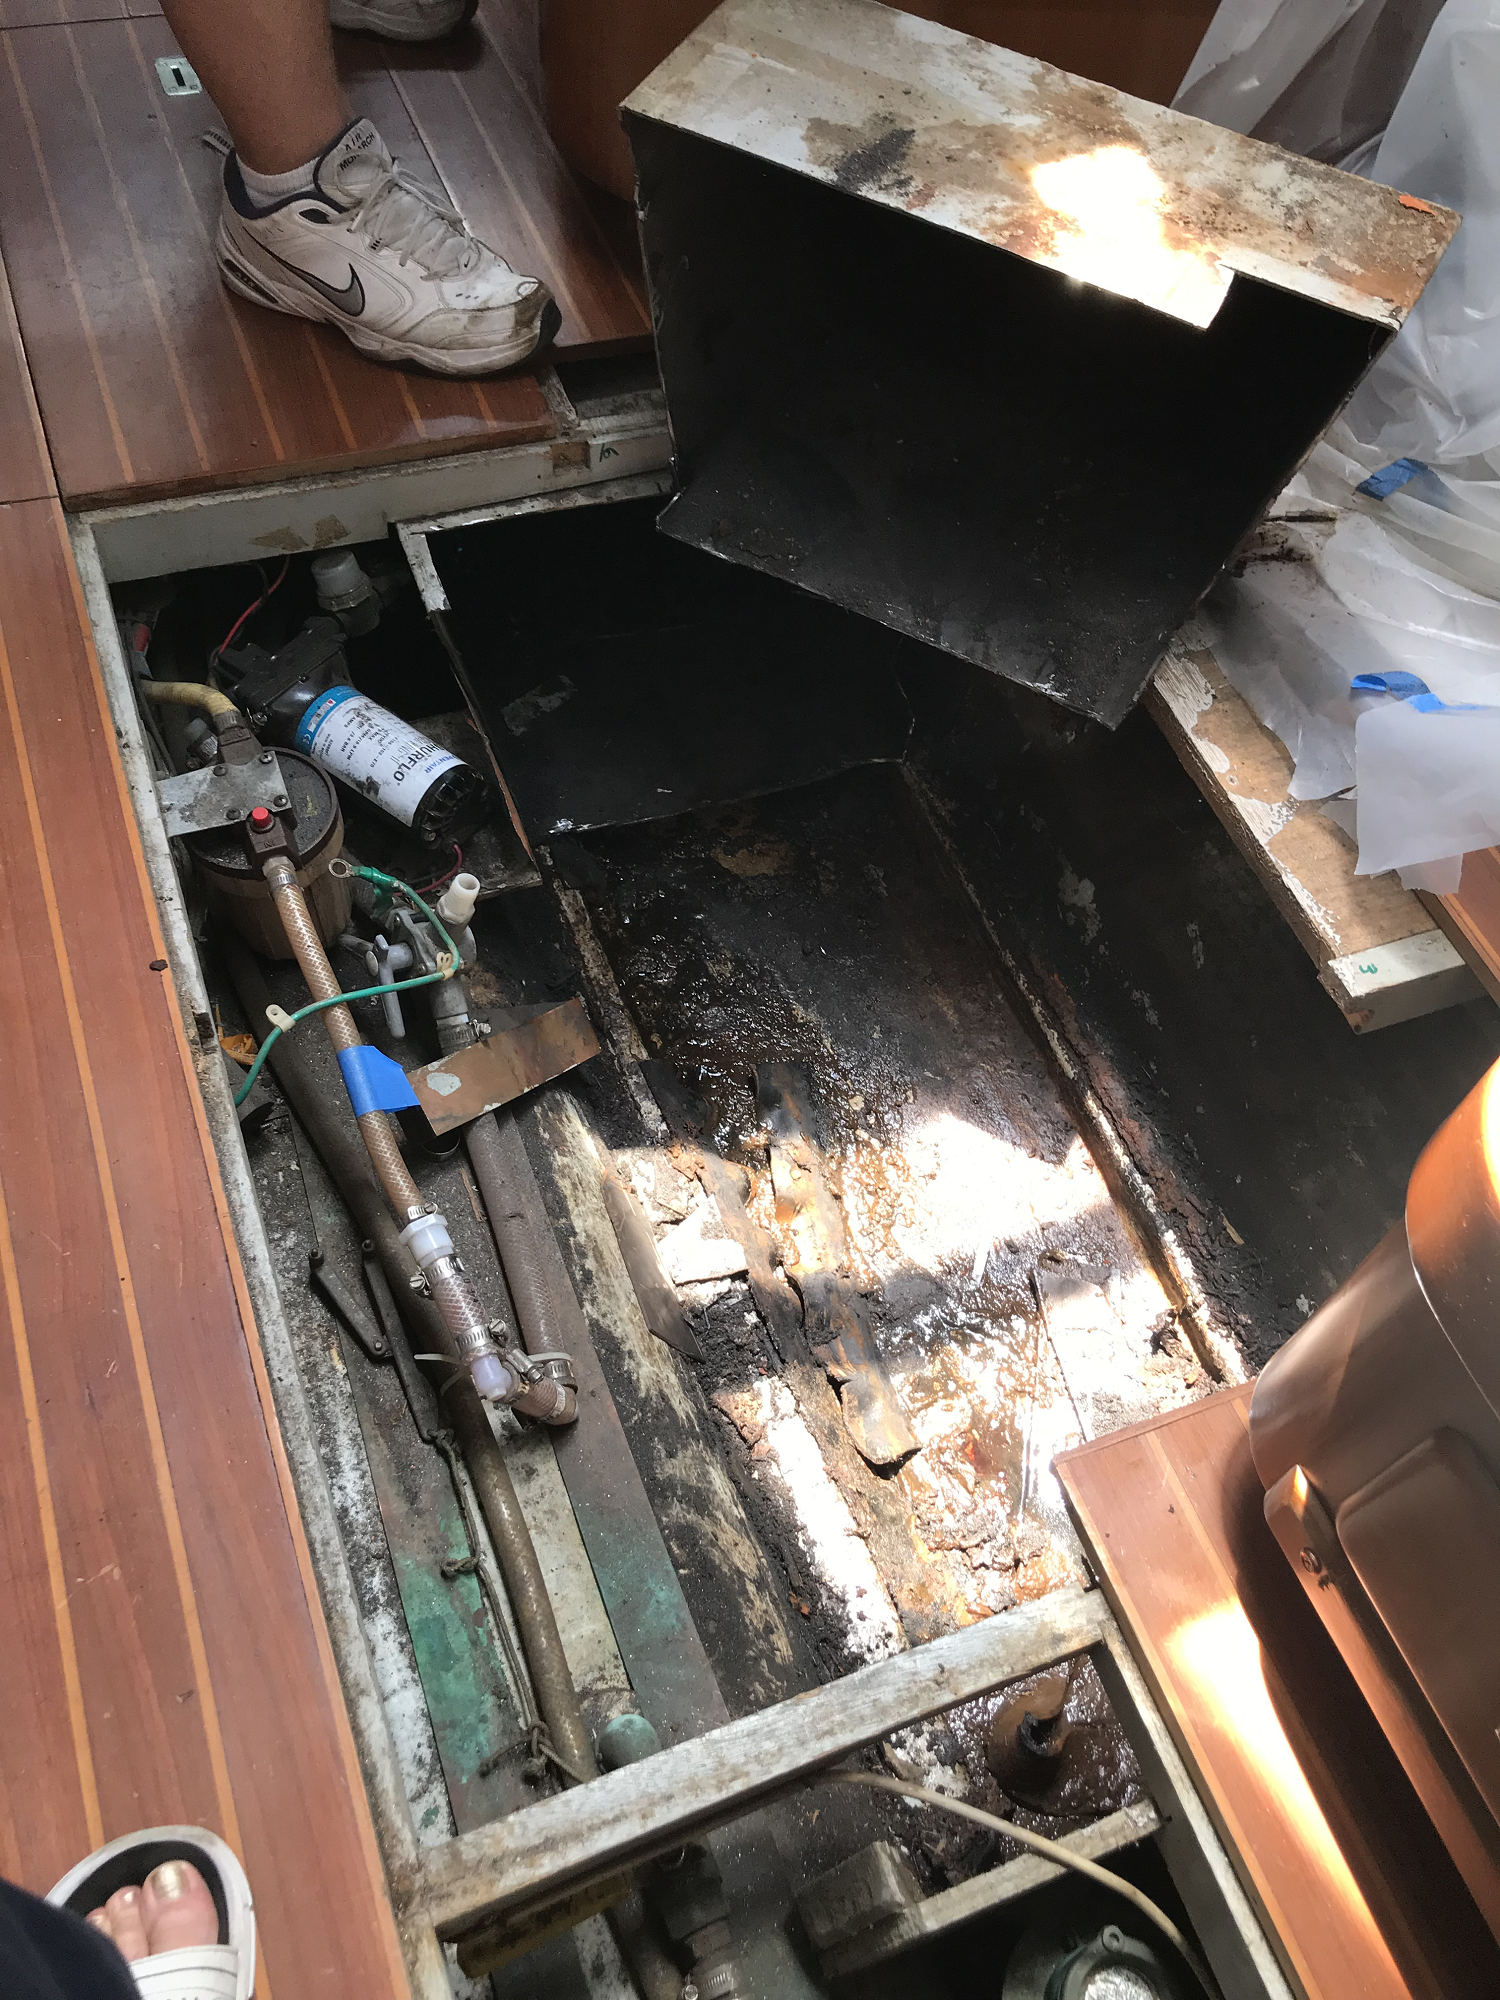
We were finally making some progress and removed the middle third of the tank. With little weight, the last third came our easy. By June 5, the last of the tank came out.
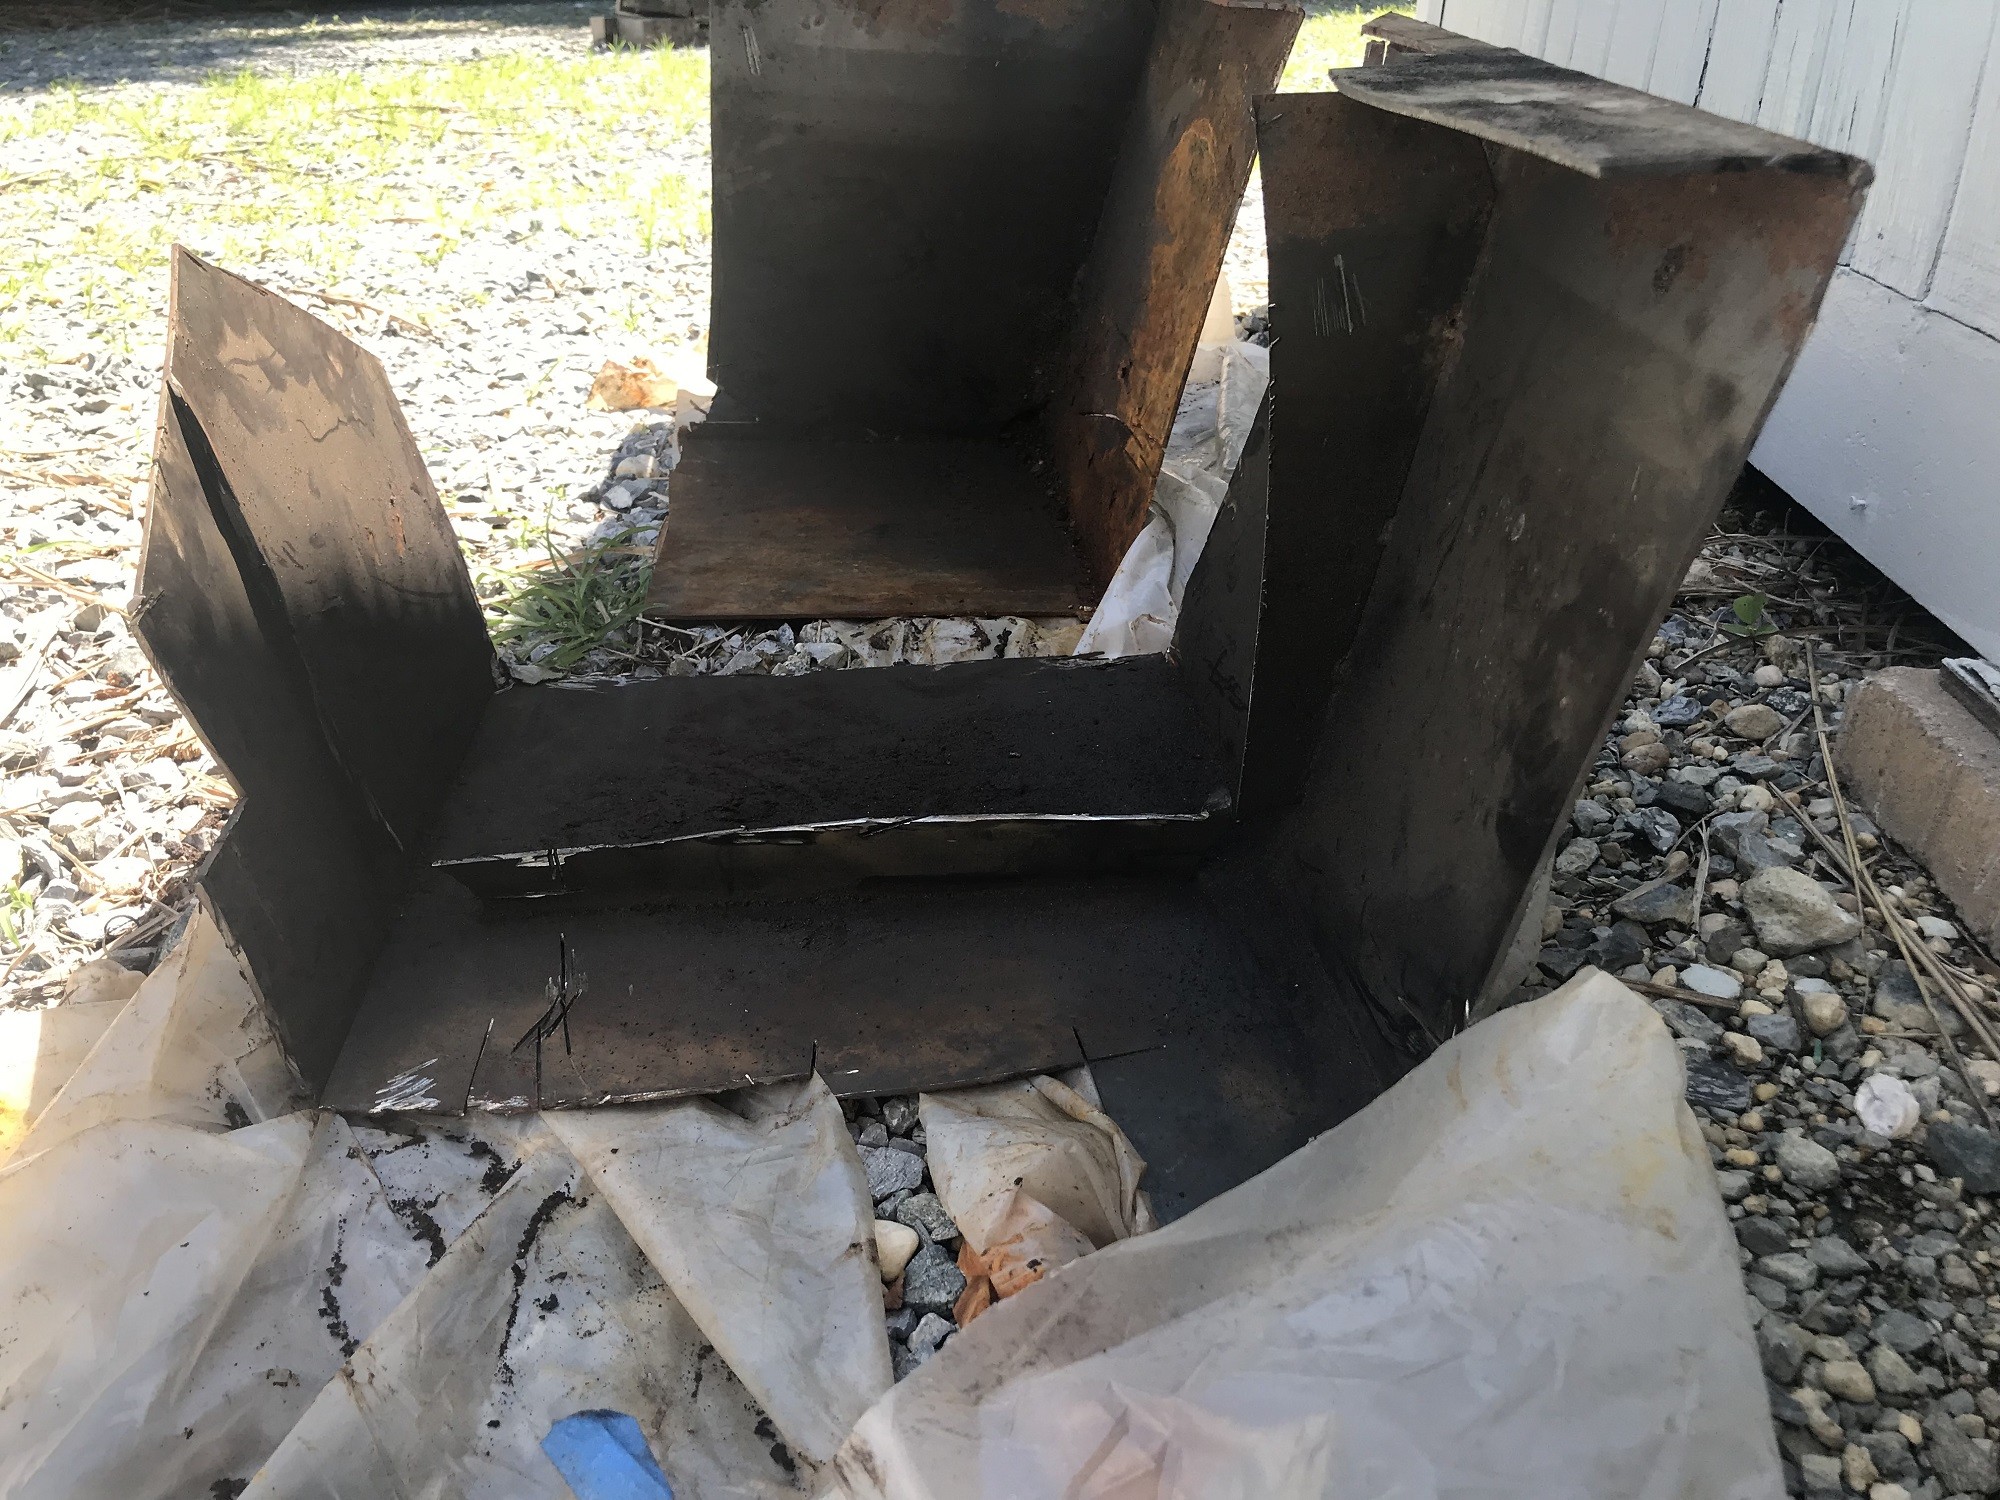
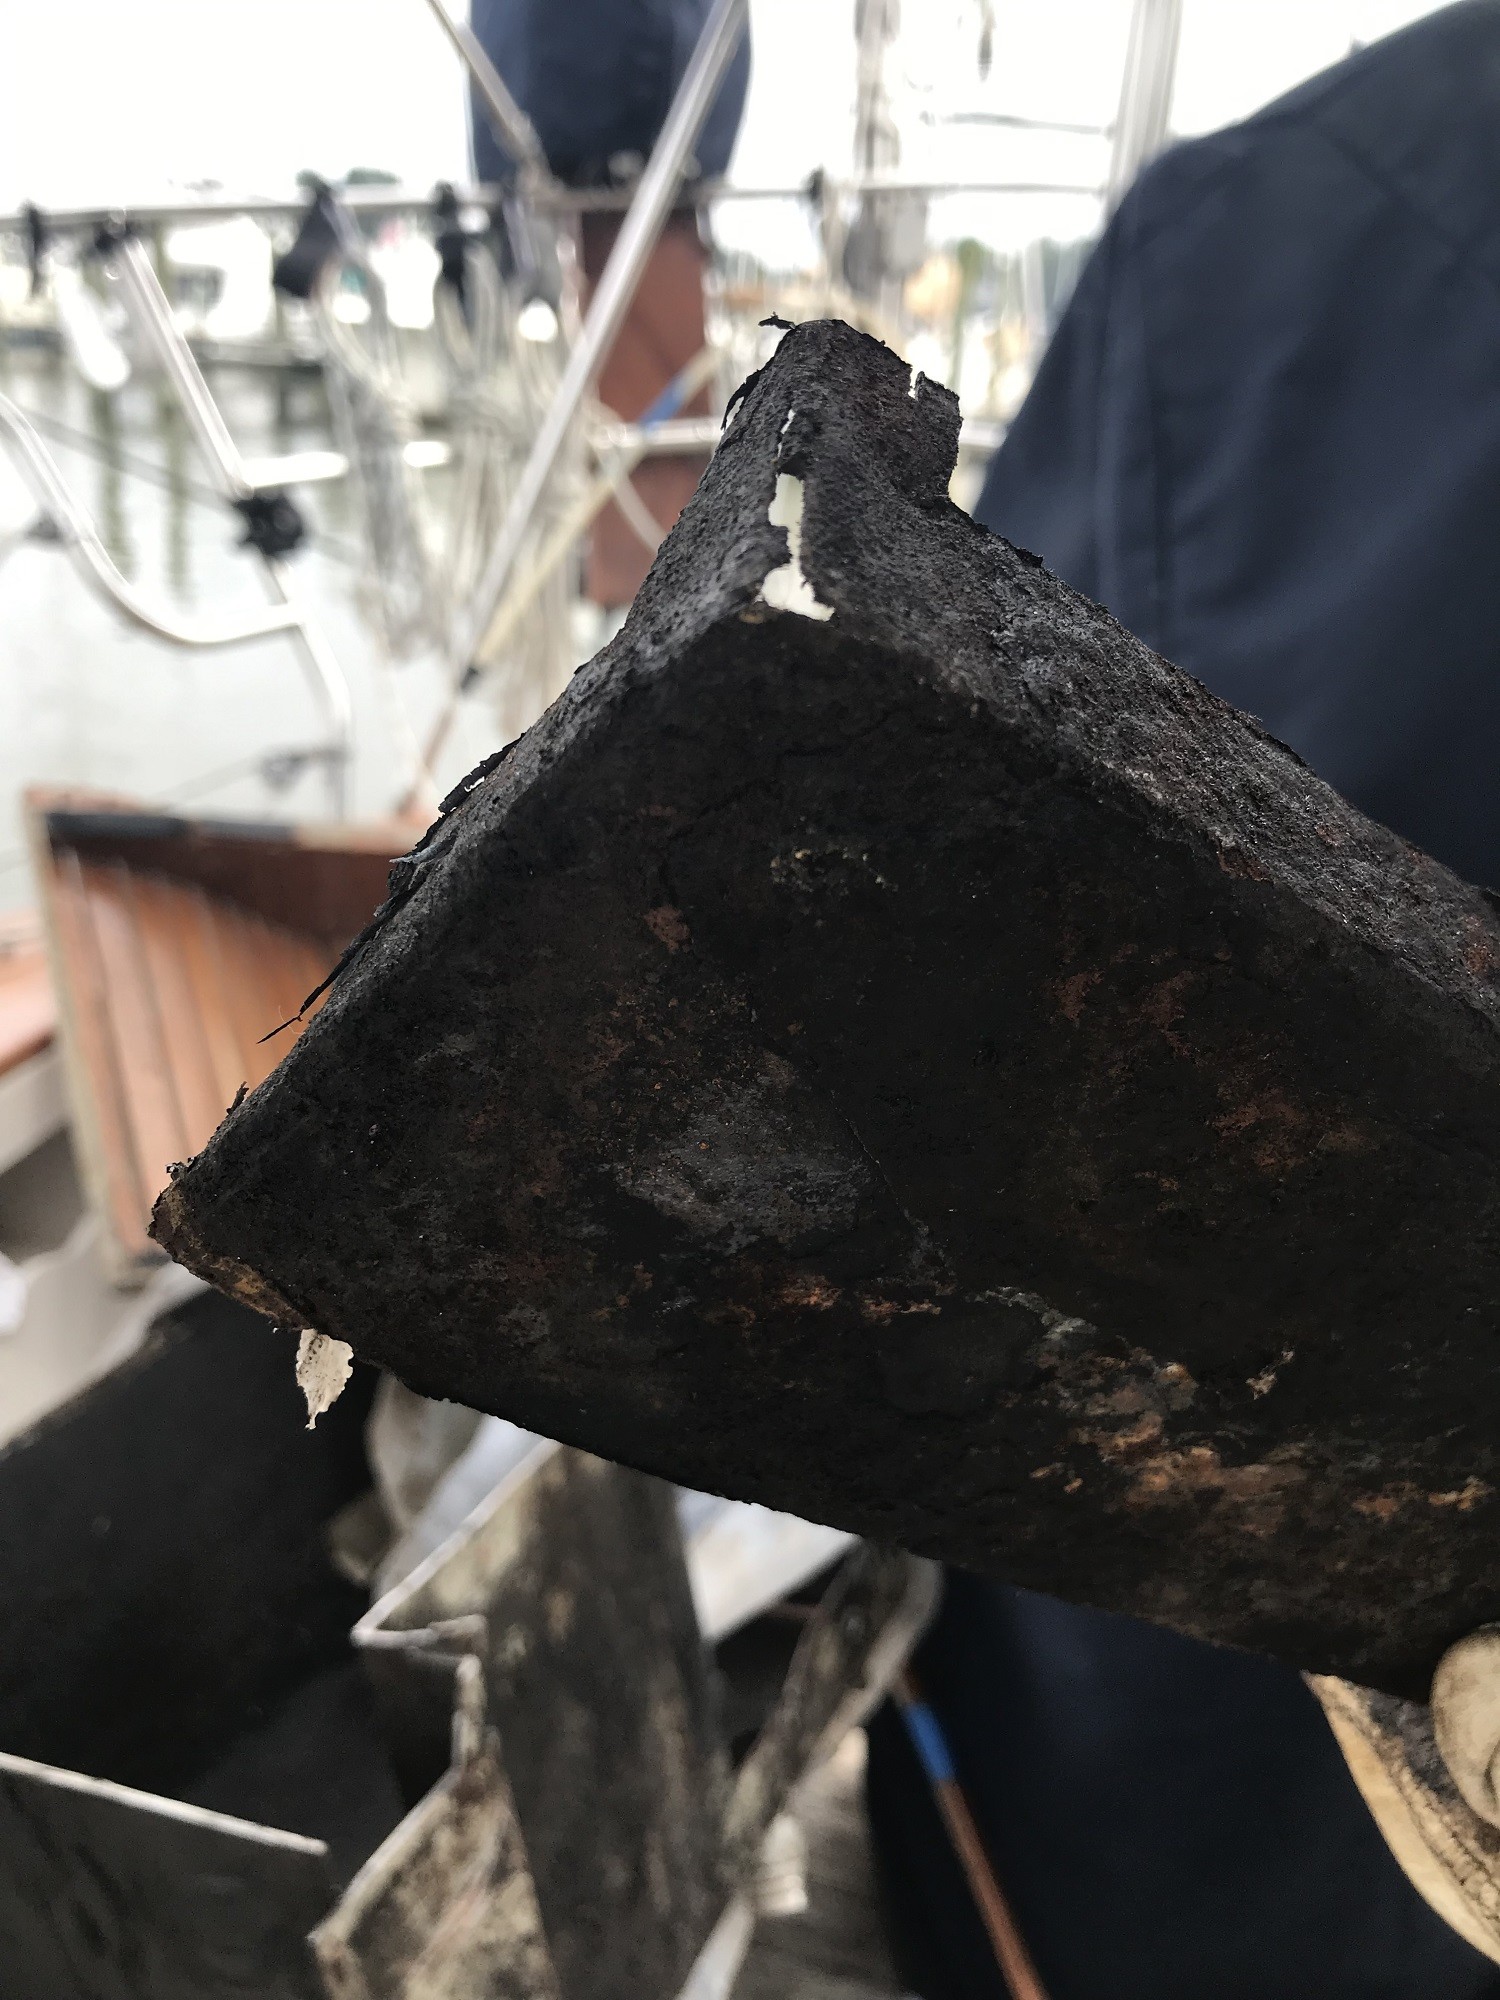
99% of the tank was in great shape. But in the starboard aft corner there was a ¾ inch hole that had rusted through over the years in a place where water collects.
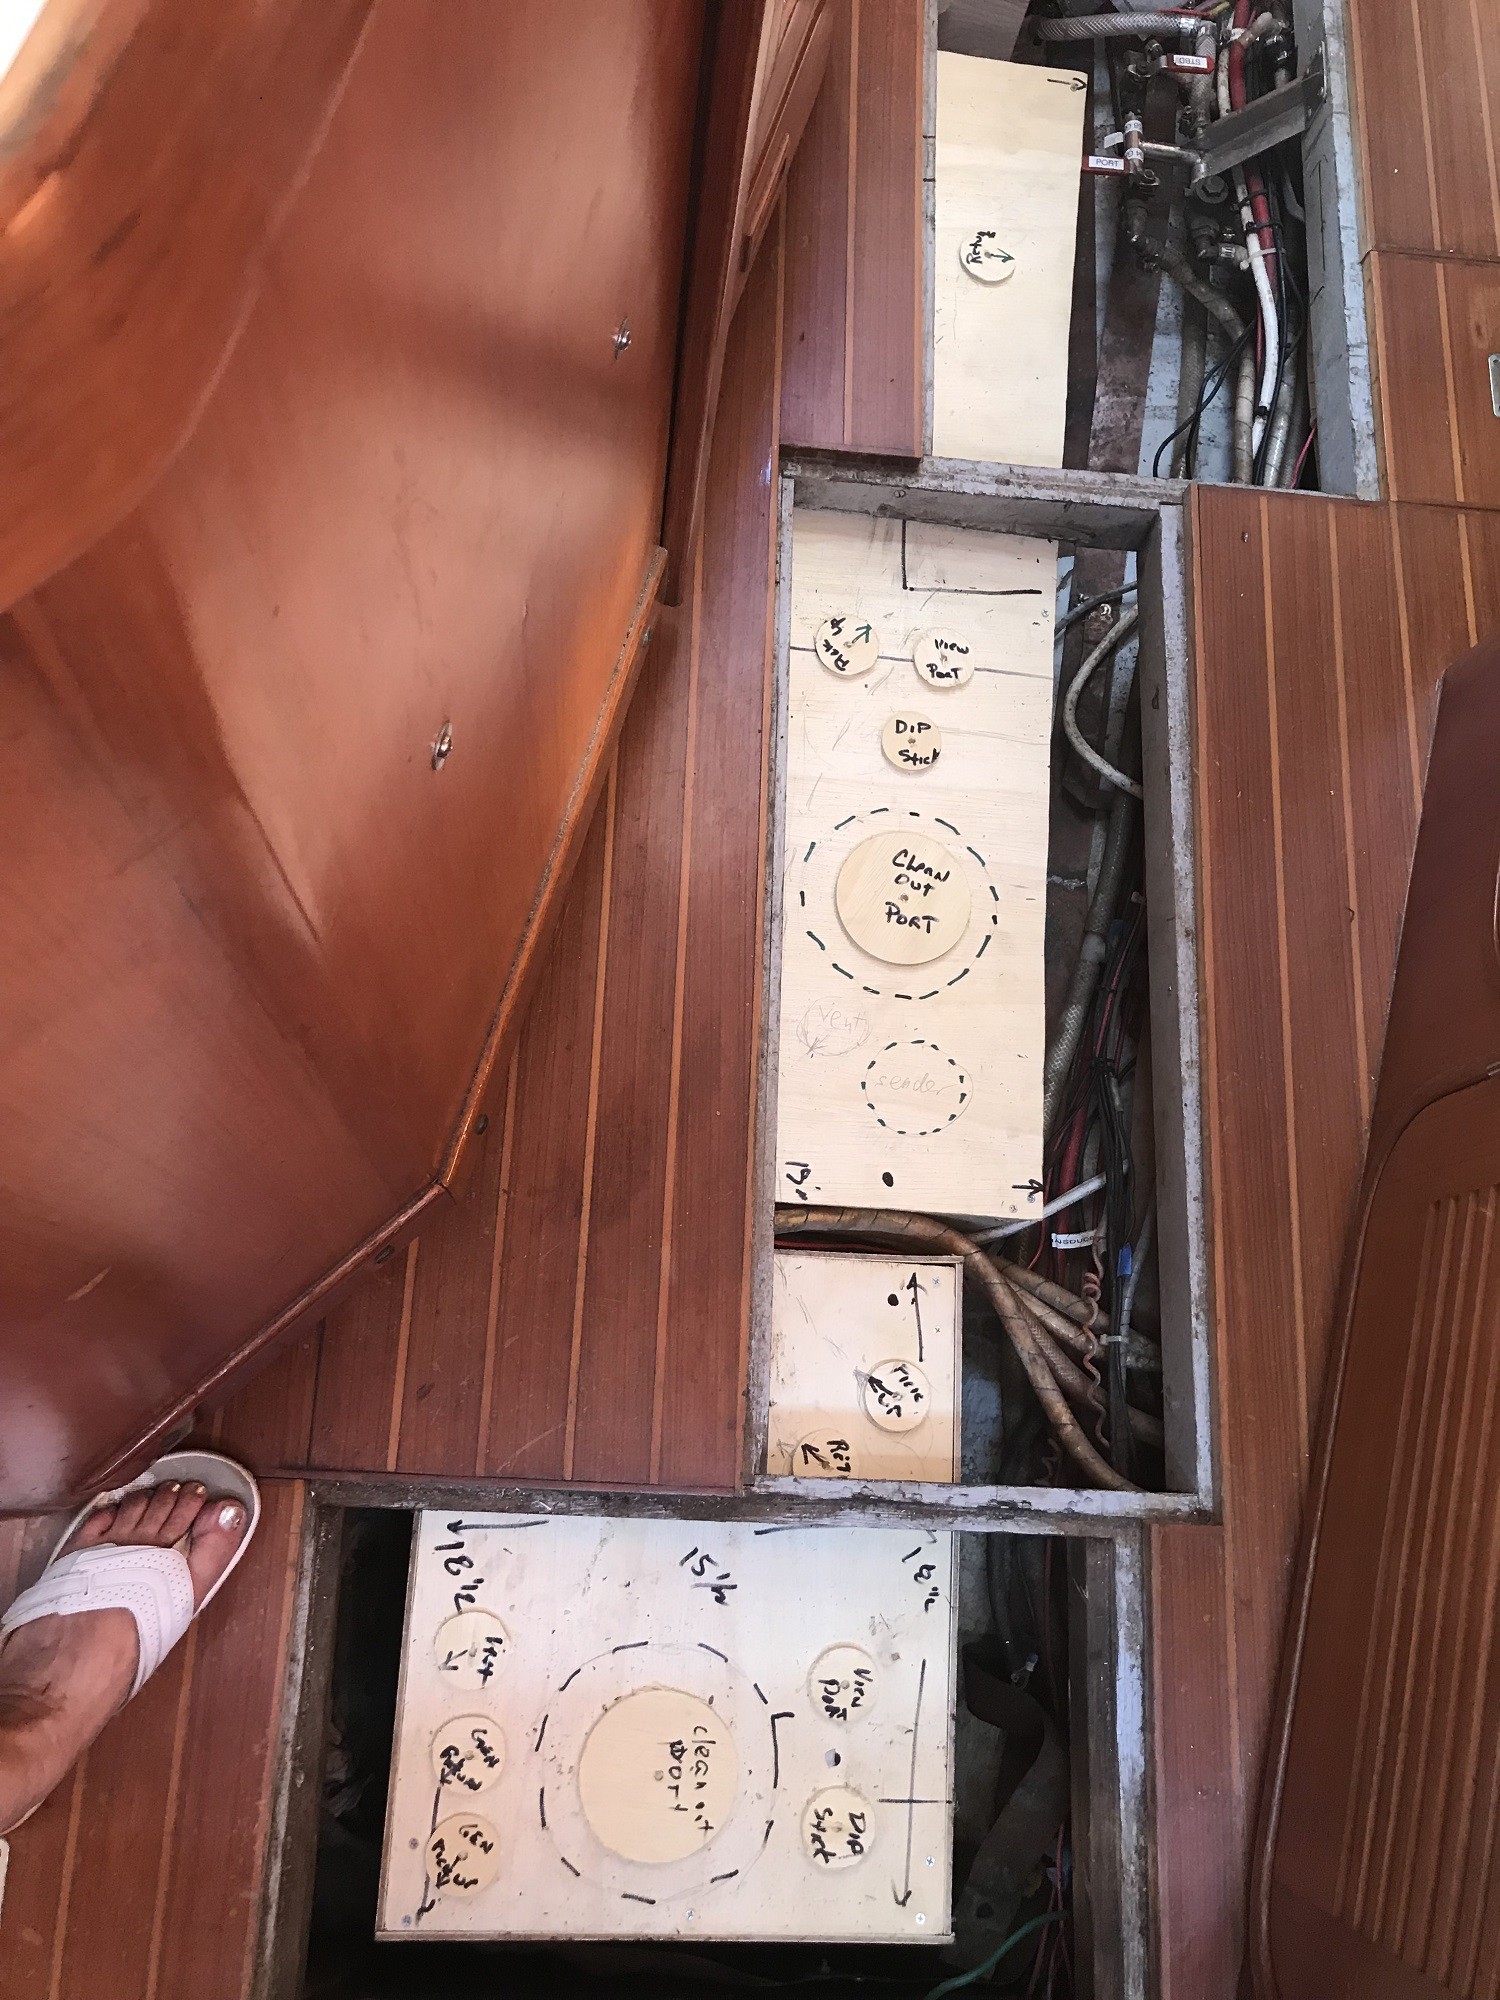
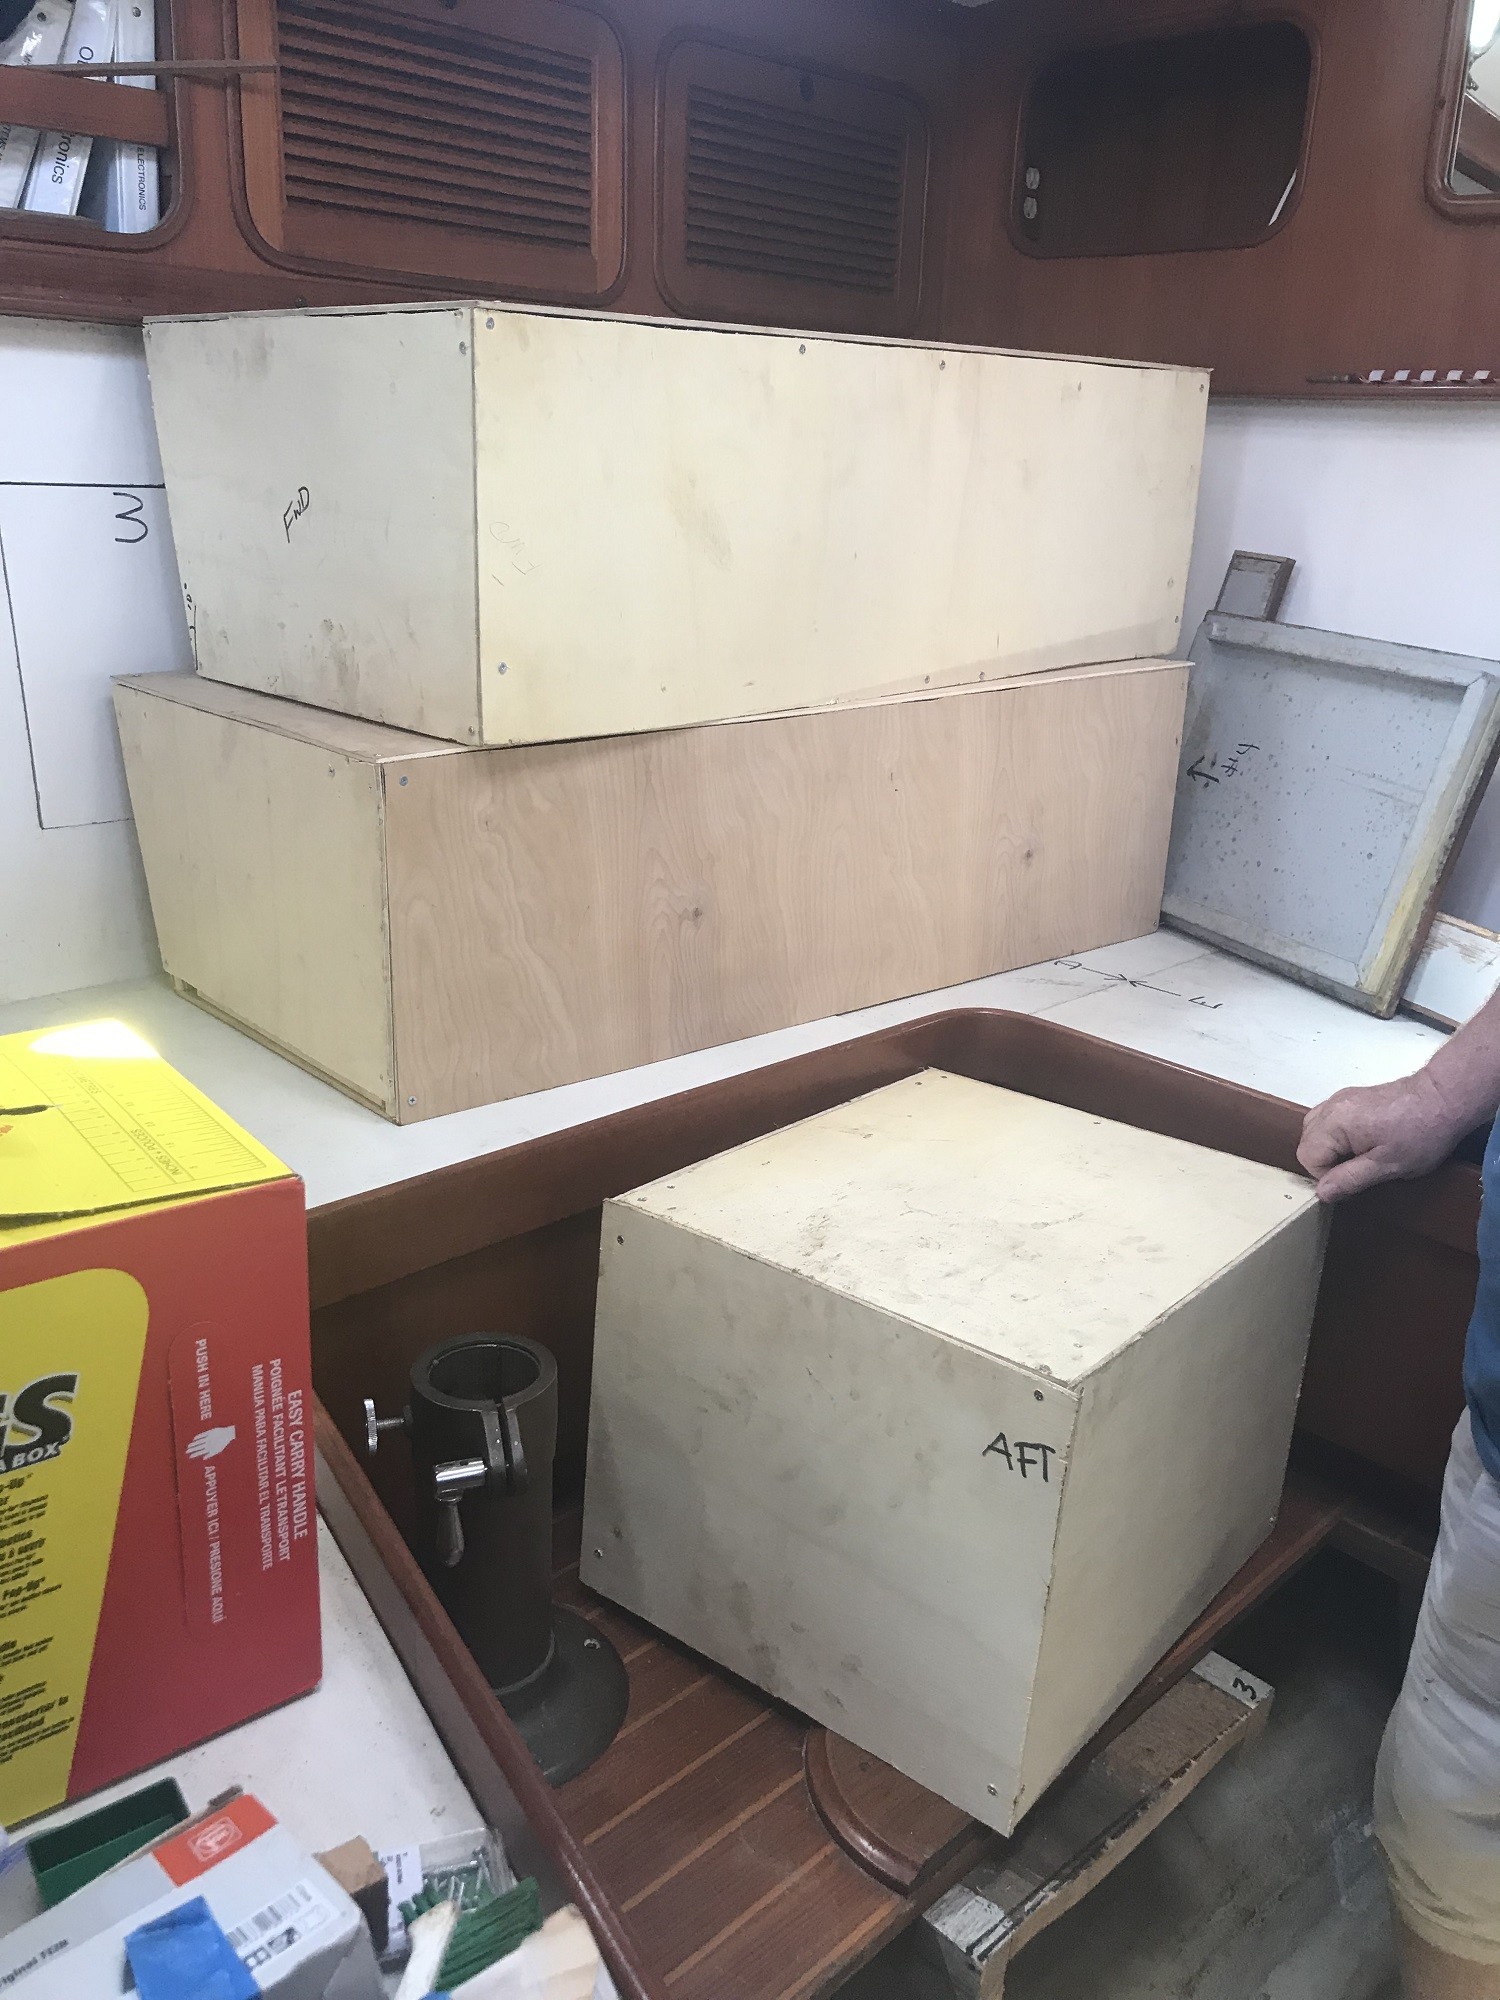
Over the next two weeks, we cleaned the bilges and built a set of plywood mock ups. The tank size was limited to 42 inches long to fit into the available hole in the floor. To make it larger, we would have had to cut out furniture, which we were unwilling to do. We ended up with two 45-gallon tanks and a small emergency/generator tank of 12 gallons. This gives us approximately 100 gallons, a 10% loss in tankage, which is entirely satisfactory.
After 3 months of really hard work, we were ready to finally deliver the mockup to the fabricator, Chesapeake Marine Engineering, located at the marina. Aric, the owner, is a marina-mate of ours and had done repair work before for us. As usual, there was a waiting line in front of us for Aric’s services, and it took six weeks to get the tanks actually fabricated.
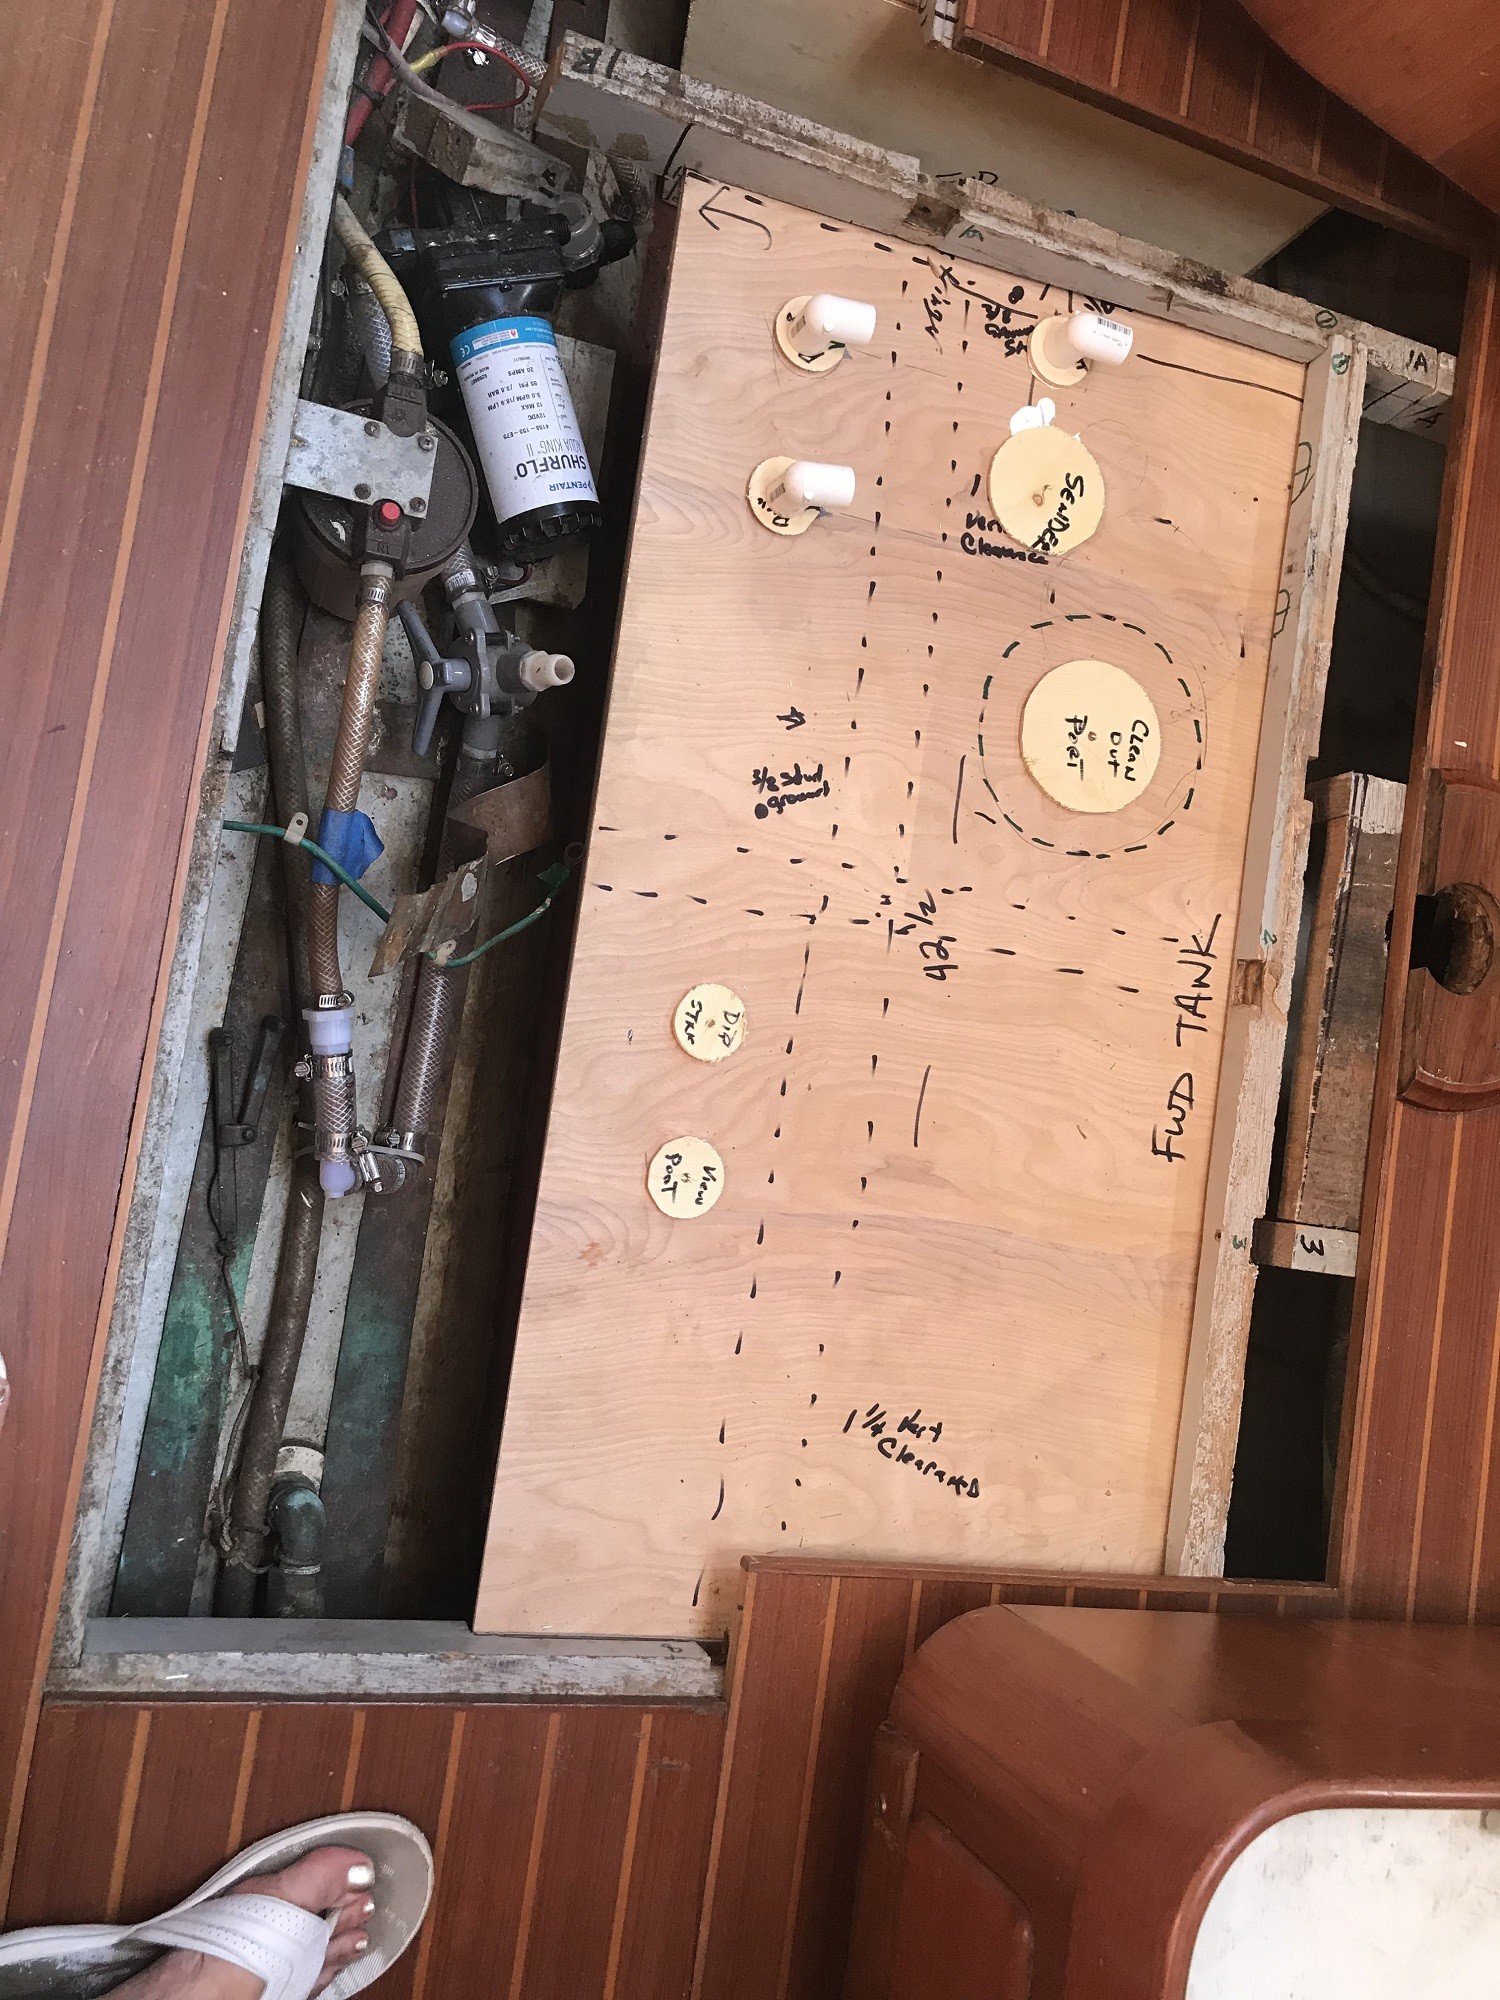
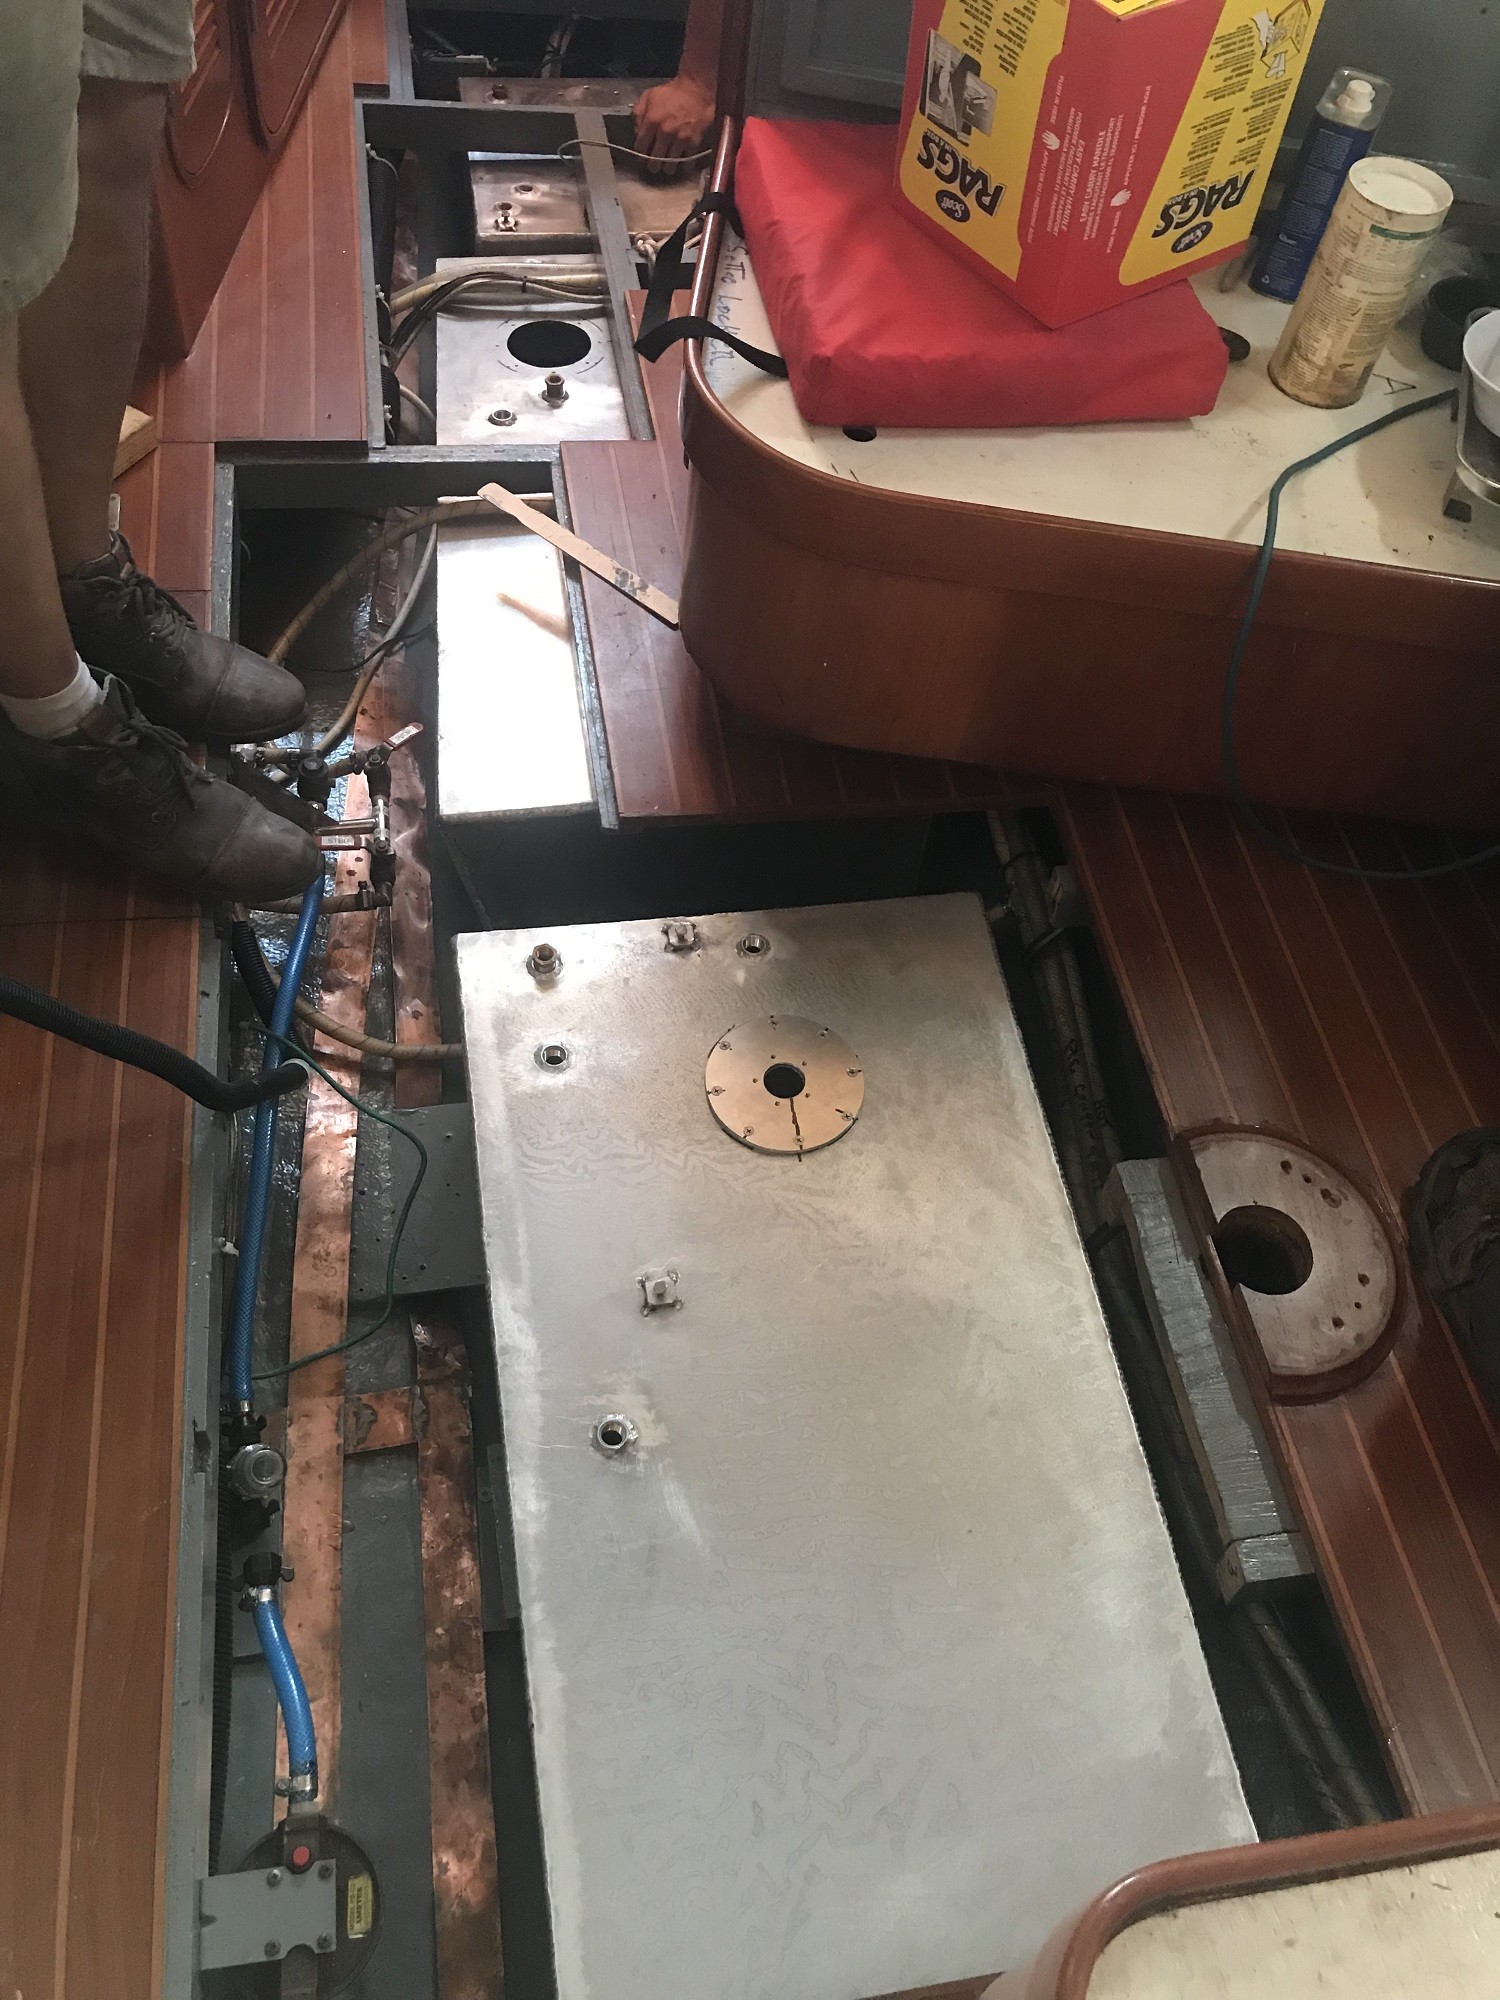
We used the time to clean and paint the bilges, plan the installation, and order the necessary parts to the fuel transfer system. On September 19, the tanks came over for the first fitting. They slipped in nicely, but with just enough clearance. The tanks were taken back to the shop and epoxied (painted), going back into the bilges on September 25. We were finally ready to install the hoses and fittings for the fuel transfer system, the second to last step.
Elena had been managing all the work on the tanks, some because she handled talking to Aric better than I and because I was at work during the week when we could actually talk to Aric and see the tanks. Elena was planning on taking her semi-annual trip to Russia on October 1, and I “demanded” that she deliver the tanks before leaving. (I really don’t demand anything). She was successful and left on time and returned at the end of October.
We copied the design that our marina-mate Rich of SV Grey Eagle used. We ended up with one design problem. The forward tank did not have enough clearance to install the fittings. We should have given ourselves an inch of additional clearance and lost the 4 gallons that inch provided. But it was too late to remove an inch of vertical tank height and reweld everything. We searched the internet, found some low-profile fittings, moved some things around, cut some wood from the floor board and the boards holding everything up.
All the fuel system – the transfer pump, the transfer filter, the fill valve, the fill hoses, the transfer valves, the transfer site glasses, all the connection hoses and the vent hoses which required a three way connection point —had to be installed completely before the first tests could be done, a constraint that I was not happy about (how would one know that something was done incorrectly in the beginning?). Plus, the water pump had to be reinstalled and the system returned to an operational state. If we didn’t get most it right the first time, the installation would be a huge mess. And much of this was in very tight spaces.
So I worked at it, laying out hoses, installing manifolds, working out the design details. Meanwhile, I started to get worried about the lack of progress I was making and the calendar. We needed to finish this job and get the engine operational before it got really cold so we could winterize the engine. I took a week off to try to make some real progress without the start and stop of weekend work.
By the end of October, I got the manifolds, the transfer pump and the transfer filter including mounting board installed and most of the hoses laid out. Elena returned, and we began putting it all together with hose fittings and hose clamps.
We took a day off for Veteran’s Day, November 11. We worked hard all three days during the long weekend, and at 1pm we were ready for a test. I spent a couple of hours hauling fuel from a neighboring marina, 5 gallons at a time in a “jerry can” fuel jug. By 4pm, we had 20 gallons in one tank and had filled the fuel transfer filter to prime the pump. Despite it being late in the afternoon, and risking an unpredictable disaster that might take all night to clean up, we started the transfer pump. Within a few seconds, the red and beautiful flow of diesel appeared in the sight glass, and we could hear the tinkle of fuel flowing back into the tank. I have seldom had such a feeling of relief and accomplishment. We detected only one small leak. We had one test left, to start the engine to make sure the fuel would flow without leaks and without getting an air lock, stalling the engine. We decided that both could wait for the next weekend.
I took the day off on Friday On Friday morning, November 15th, we fixed the leak. At about 2pm, after 7 and half months of work, we held our breath while Elena turned the key to start the engine. The engine started right up and ran smoothly for 45 minutes. We took the evening off to celebrate.
We still have much work to do putting the boat back together, making sure the tanks cannot move, and tiding up the wiring and the hoses. But the majority of work is done and we are very happy to be operational again.
Notes for Baba Owners:
Root Cause
I have come to the conclusion that the root cause of the corrosion was a blocked drainage port in the bulk head at the aft end of the tank. Over several years, we have had water collect between the tank and the bilge wall. I tried to clear a path for that water, but was unsuccessful at getting a drill through without threatening to put a hole in the tank. The blocked port did prevent the fuel that had leaked out of the tank from going into the sump, where the bilge pumps pickups are located, and causing a more serious pollution problem. I found the blocked port once I removed the tank.
Getting the old tank out
As others have done, we cut the cabin sole under the table. This opening gave us approximately 42 inches of access and was the limiting factor relative to the size of the new tanks. The tank is about two inches above the floor of the bilge resting on two shoulders that house drain pipes from the anchor locker and the mast drain, so cutting through the bottom of the tank is not problem as long as care in taken, We cut out the front end of the tank and then used crowbars and comealongs (ratchet pulley) to inch the tank forward. The aft inspection port studs had to be grinded off as well as all other fittings including the fill hose fitting. Once we moved the tank a few inches, we cut that section and then moved the tank a few more inches. Finally, we were able to get the last 25% of the tank out through the openings and removed it relatively intact.
Number, size, and material of the new tanks.
Everything that I read and everyone I talked to recommended that I use aluminum for new tanks. We wanted strength and longevity so we used ¼ inch thickness. The fabricator used 5052 alloy aluminum and double welded the seams. The new tanks have to fit in the opening that was cut to remove the old tank. For us that limitation was 42 inches. There are a couple of design decisions to make early. One is where the tank will sit. We chose to keep the drain lines and the two inches of space under the tanks. Others have chosen to cut the drain lines out and get additional tankage and clearance. We chose to have two large tanks (45 gallons each) and one small tank (12 gallons) that the generator could use. This complicated the transfer system, but maximized tankage. We compensated a bit by bringing the tanks as high as possible making adjustments to the stringers and cabin soles as necessary. However, this complicated the placement of fittings significantly.
The tanks were finished with epoxy, water tested and air tested to 7psi.
Fittings.
I left 1 ½ inches of clearance on the forward tank for fittings. The middle and small aft tank had additional clearance due to the slope of the bilge relative to the cabin sole. I estimated the height of the fittings (street elbows) at 1 ¼ inches but did not take into account the fact that NPT threads only go for a few threads, leaving ¾ inch additional height. In addition, the bungs that were welded into the tanks were ¼ to ½ inch high, providing additional height. When that was discovered, we were faced with three options: 1) Rebuild the tank reducing the height by an inch (with loss of tankage); 2) Cut the drain lines and let the tank sit on the deck 3) Adjust the stringer and the cabin sole boards to fit the additional height. We chose Option 3. One other detail we missed was the supports on the removable cabin sole boards. I had marked the stringers on the mockups that I had provided to the fabricator, but had neglected to take into account the supports which were an inch wide. As a result, I had to rout the supports on the cabin sole boards. I also had to use a piece of angle aluminum for a stringer because the tank was so high that the wood stringer had to be cut so thin it broke easily. It took several days of work and lots of trial and error, to get everything square and even.
Fill Hose
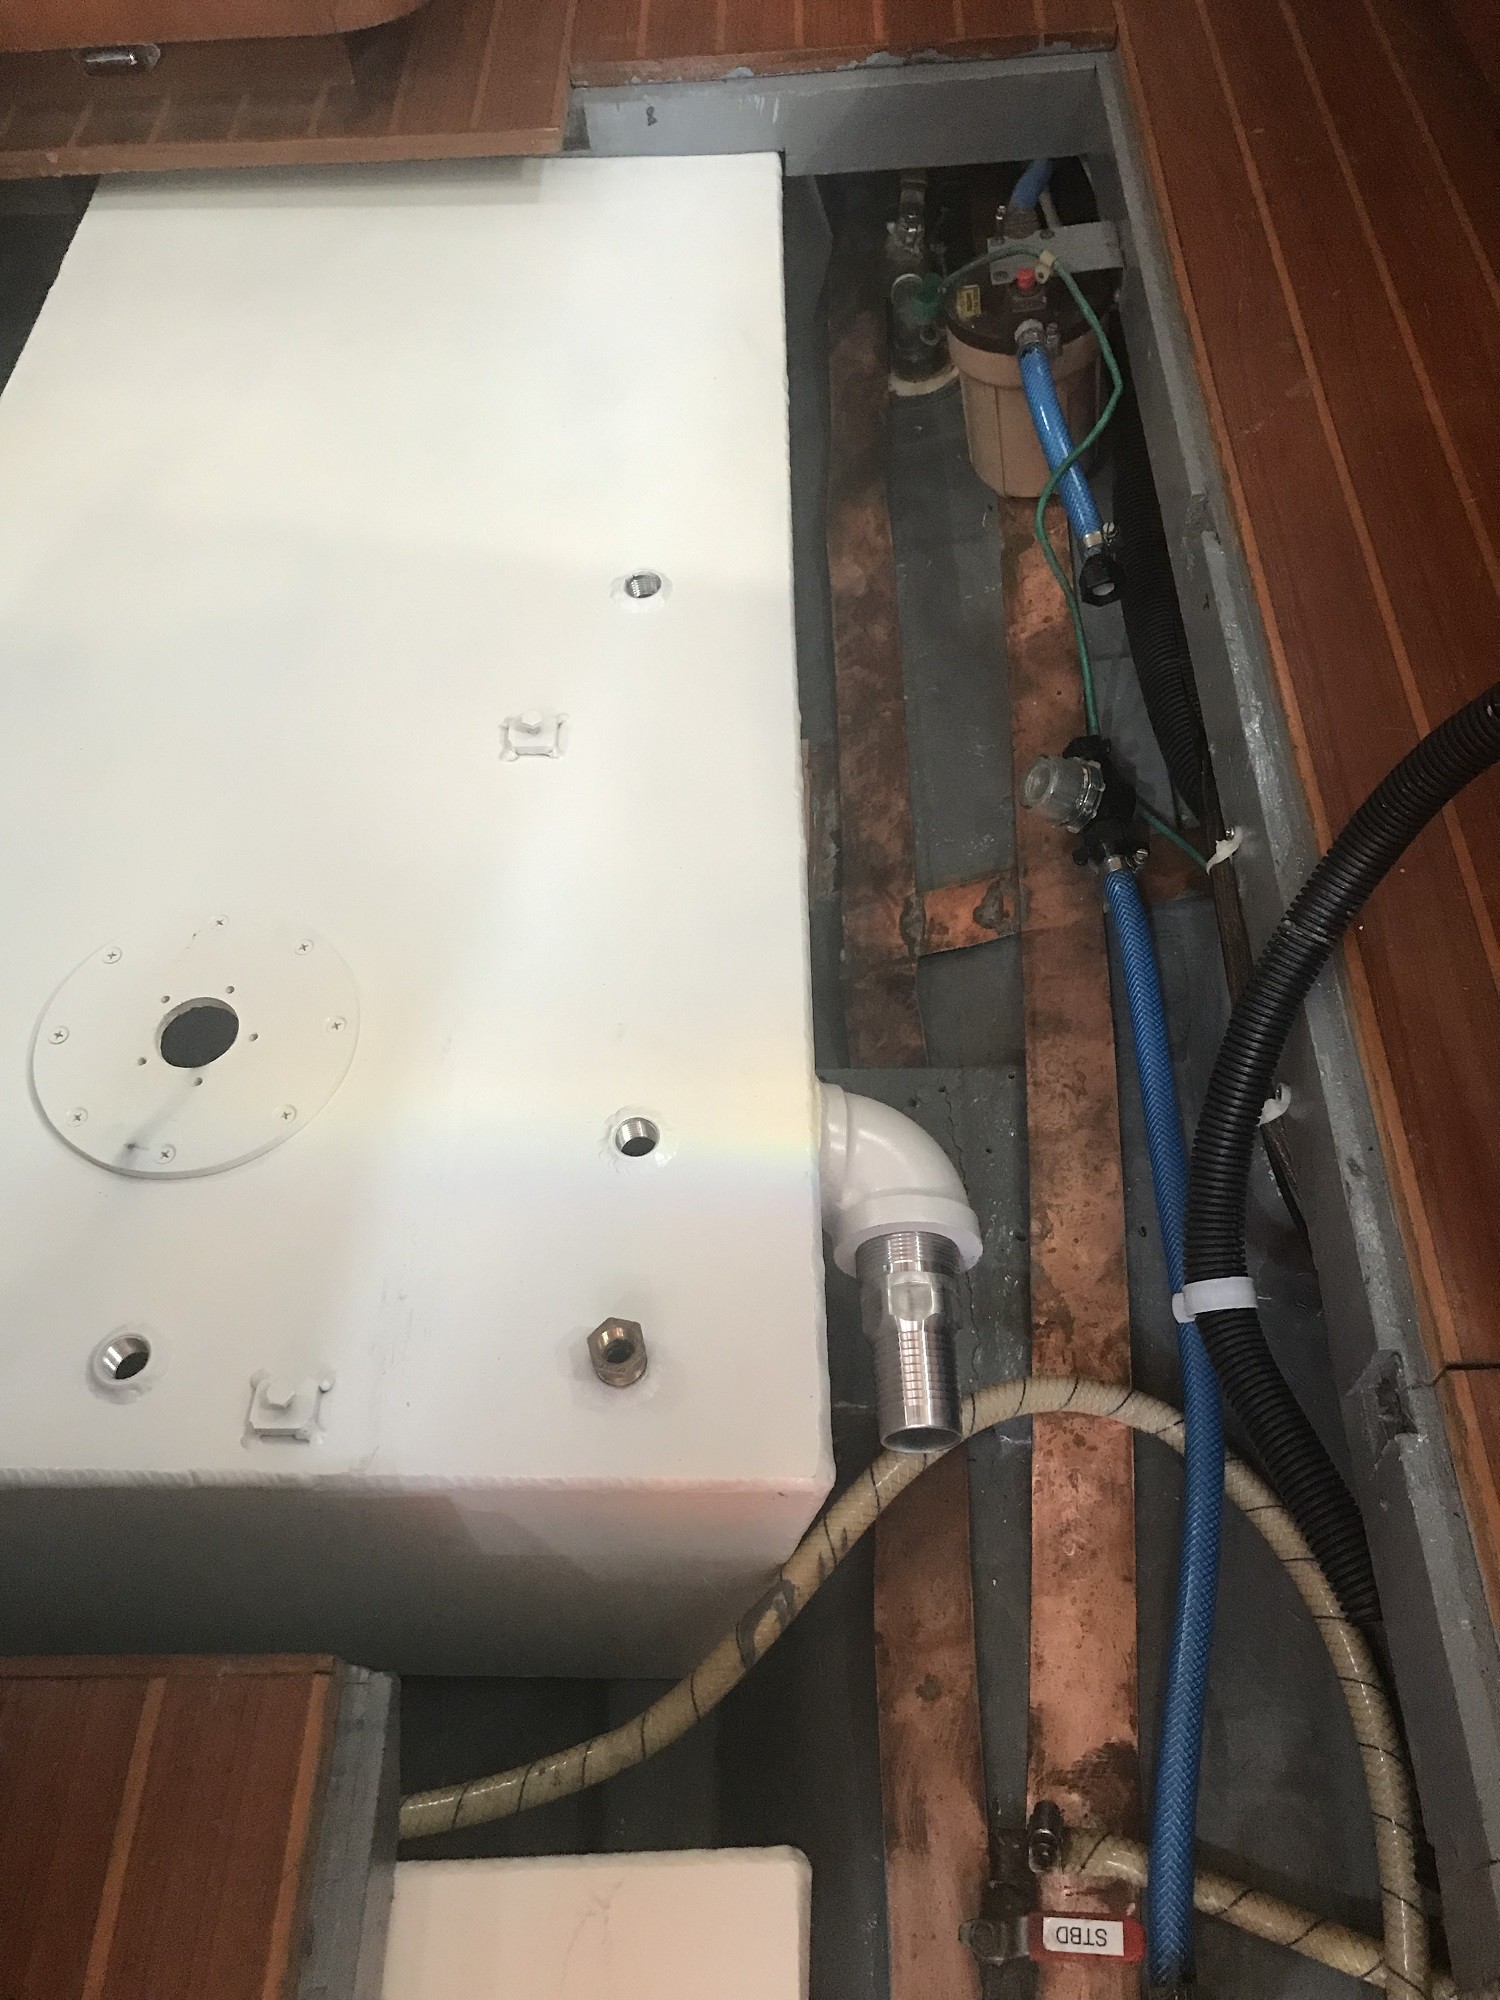
The fabricator ran the fill hoses for both large tanks on the starboard side. I would have preferred the fill hose on the forward tank to run on the port side, but he was afraid the tank would not go in the access hole if we did. In the end it all worked out, but did make the space alongside the tank crowded. We used A2 hose for the fill hose (A1 does not come in 1 ½ inch size), kept the old hose from the deck fill, and put a diverter valve in the galley under the cabin sole.
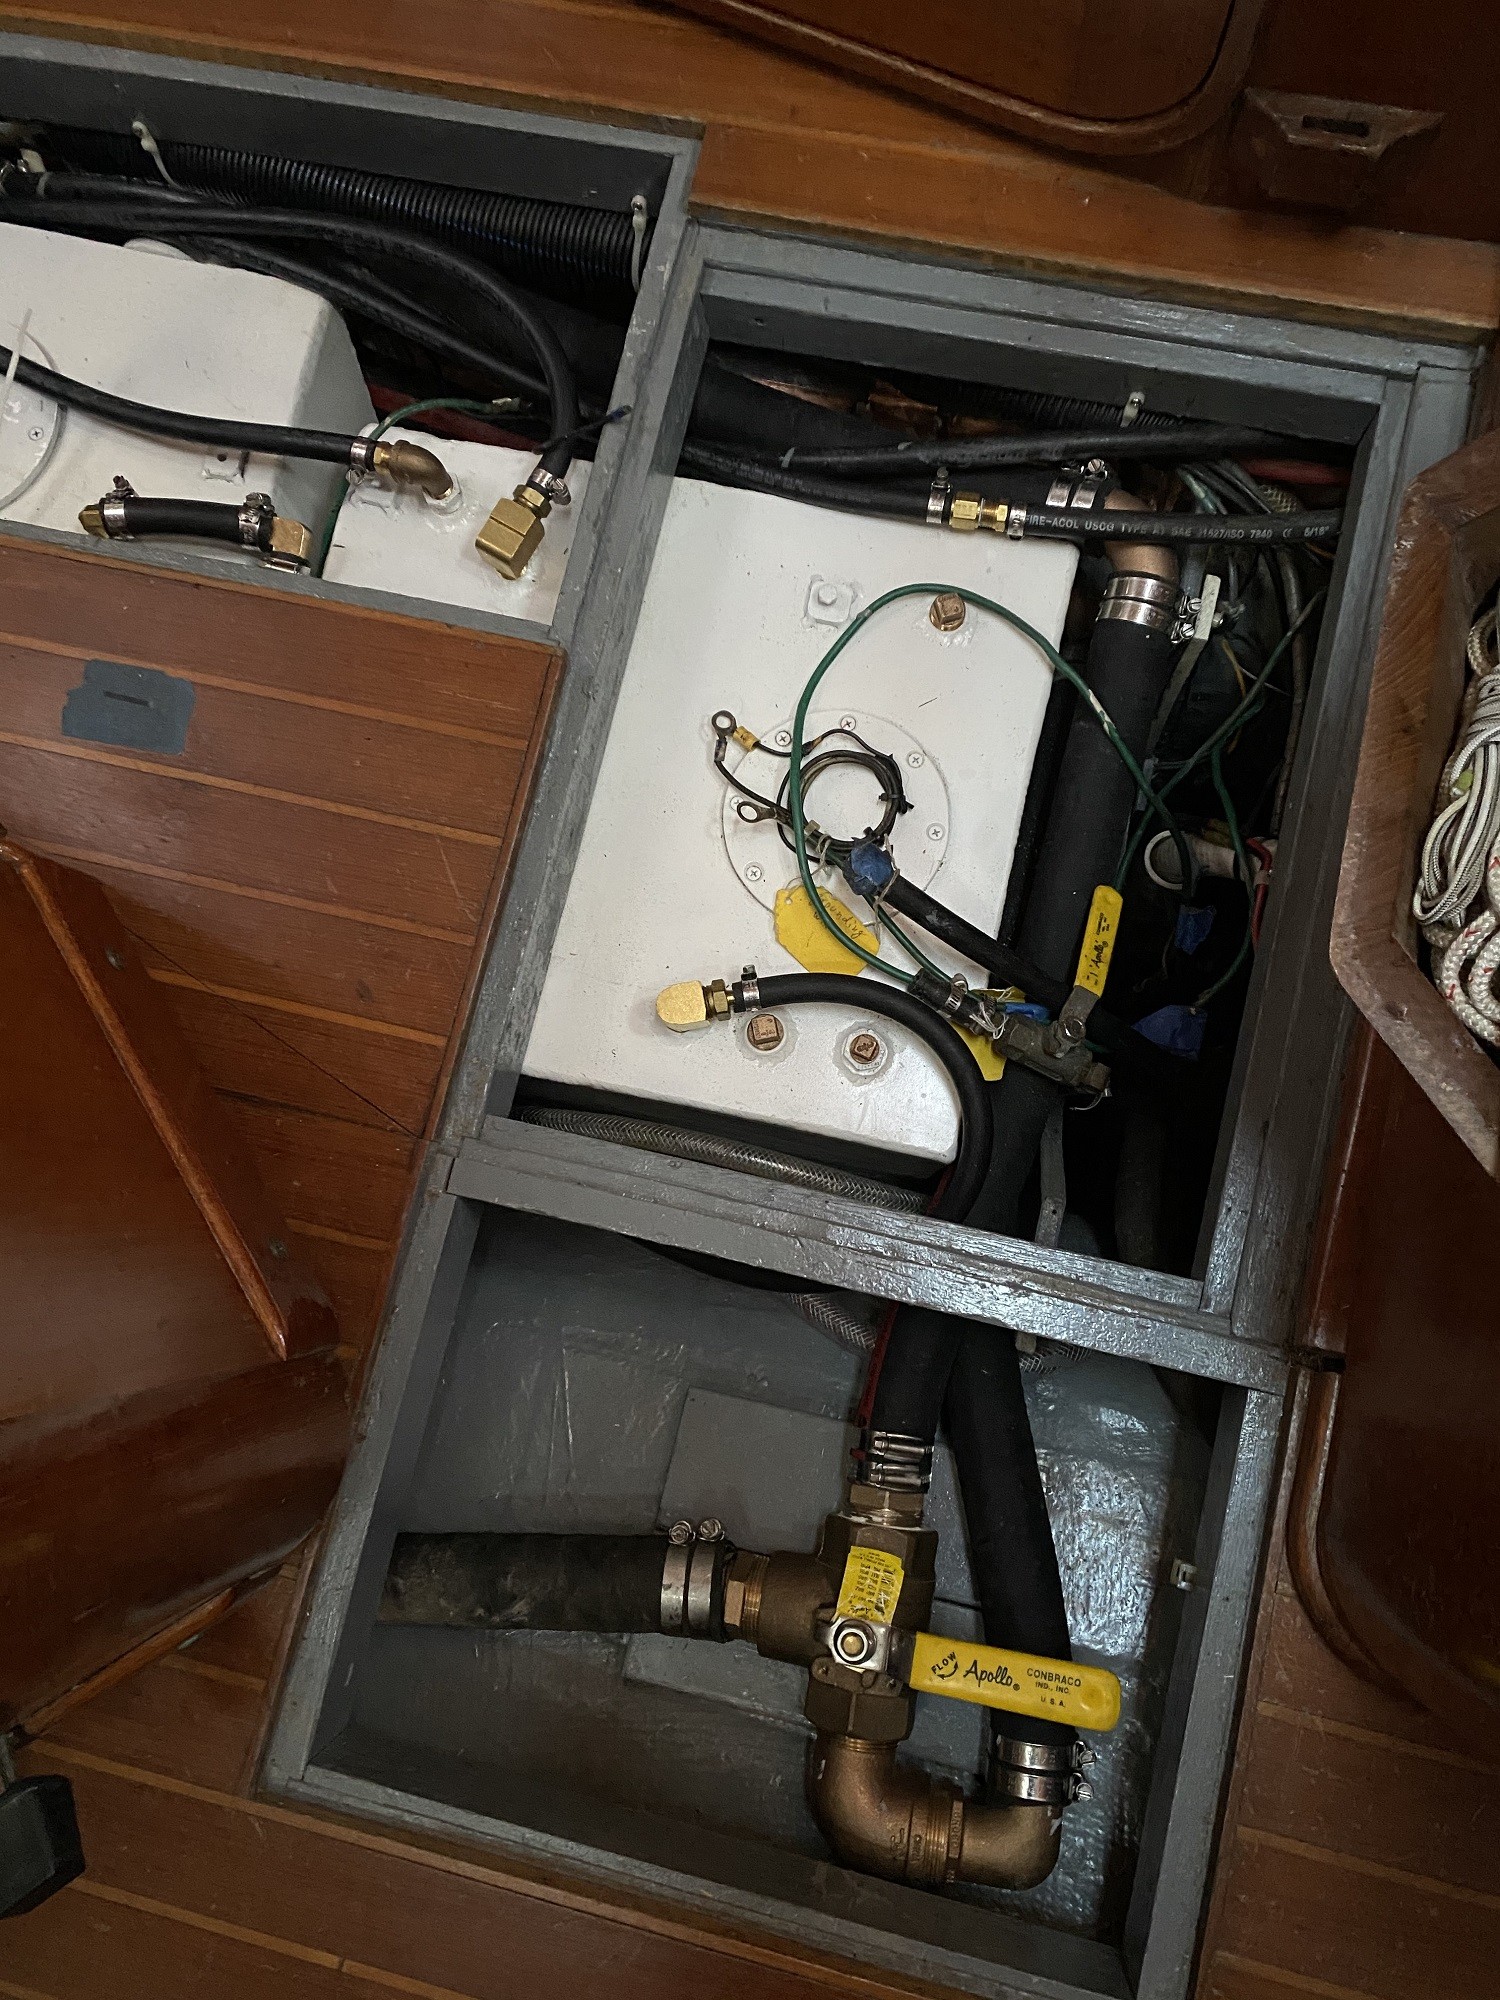
Fuel Transfer System
We copied the design of our marina mate, Gray Eagle. We used an aluminum pneumatic manifold, low-profile stainless-steel valves, and either aluminum or stainless-steel hose fittings. We included sight flow glasses to show the flow of few. We also installed a Parker 500MA turbine fuel filter and EngineGear 2gpm gear fuel pump as a fuel polishing system.
.
Cecil, Terrific article and pictures. This should work well as a road map for any other Baba owner faced with the same project. If I could add one more comment: The fuel tank replacement is one project that lends itself to “project creep” more than any other. Be aware that once you get the old tank out many other issues will become visible and add to the project. It will be a “one time only” opportunity to reach under the cabin sole and access other systems.
Great to get this behind you and know you can sail without worry of a dreaded fuel leak.
Rich
Just following the lead of “Gray Eagle”